Table of contents
Table of content:-
Introduction
Brief overview of the project
Objectives and goals
Git Integration
Explanation of Git usage in the project
Branching strategy
Collaboration workflows
Docker Implementation
Introduction to Docker
Dockerfile creation
Docker image building and tagging
Docker containerization
Kubernetes Orchestration
Overview of Kubernetes
Deployment of Docker containers on Kubernetes clusters
Service discovery and load balancing
Scaling and self-healing mechanisms
ArgoCD Continuous Delivery
Introduction to ArgoCD
Setup and configuration of ArgoCD for GitOps
Continuous deployment pipelines with ArgoCD
Automated synchronization with Git repositories
Code Quality Analysis with SonarQube
Overview of SonarQube
Integration of SonarQube into the CI/CD pipeline
Static code analysis and quality metrics
Continuous code quality monitoring
Continuous Integration with Jenkins
Introduction to Jenkins
Configuration of Jenkins pipelines
Automated testing and code validation
Integration with Git and GitHub repositories
GitHub Repository Management
Utilization of GitHub for version control
Repository organization and management
Pull request workflow and code review processes
Branch protection and access control
Conclusion
Summary of project achievements
Challenges faced and lessons learned
Future enhancements and recommendations
Pre-requisite
Creating 2 EC2 instance:- 1 for Jenkins Master and other one for Jenkins Agent
Go to the Jenkins Master EC2 instance machine and type below commands to update the system and install Java and Jenkins
"sudo apt update -y"

"sudo apt upgrade"
Now try to install Java in both machine.
"sudo apt install openjdk-17-jre"

If you want you can change your machine hostname by going to the below path
"sudo vi /etc/hostname"
Now try to install Jenkins on Jenkins-Master EC2 instance using below commands
**"sudo wget -O /usr/share/keyrings/jenkins-keyring.asc
**pkg.jenkins.io/debian-stable/jenkins.io-202..echo deb [signed-by=/usr/share/keyrings/jenkins-keyring.asc]pkg.jenkins.io/debian-stablebinary/ | sudo tee
/etc/apt/sources.list.d/jenkins.list > /dev/null
sudo apt-get update
sudo apt-get install jenkins"


Now go to the Jenkins-Master and Jenkins-Agent EC2 instance and try to edit some configuration file and for command just follow the below snap attached
Do this on both the EC2 instances:- Jenkins Master and Jenkins Agent

Uncomment these 2 lines in the sshd_config file and then reload the sshd service.
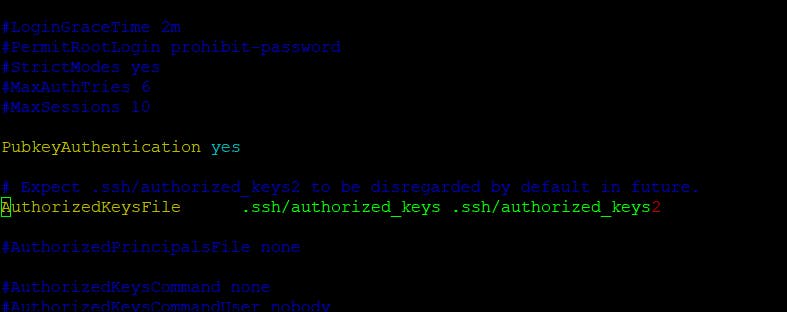
Reload the sshd service using command "sudo service sshd reload"
Now let make a ssh connection in between Jenkins Master and Jenkins Agent
Go to the Jenkins Master instance .ssh folder and run command "ssh-keygen"

Now copy the id_rsa.pub key into Jenkins Agent authorized_keys


Now open Jenkins portal on port number 8080. Make sure 8080 port number should be open Jenkins Master EC2 instance security group
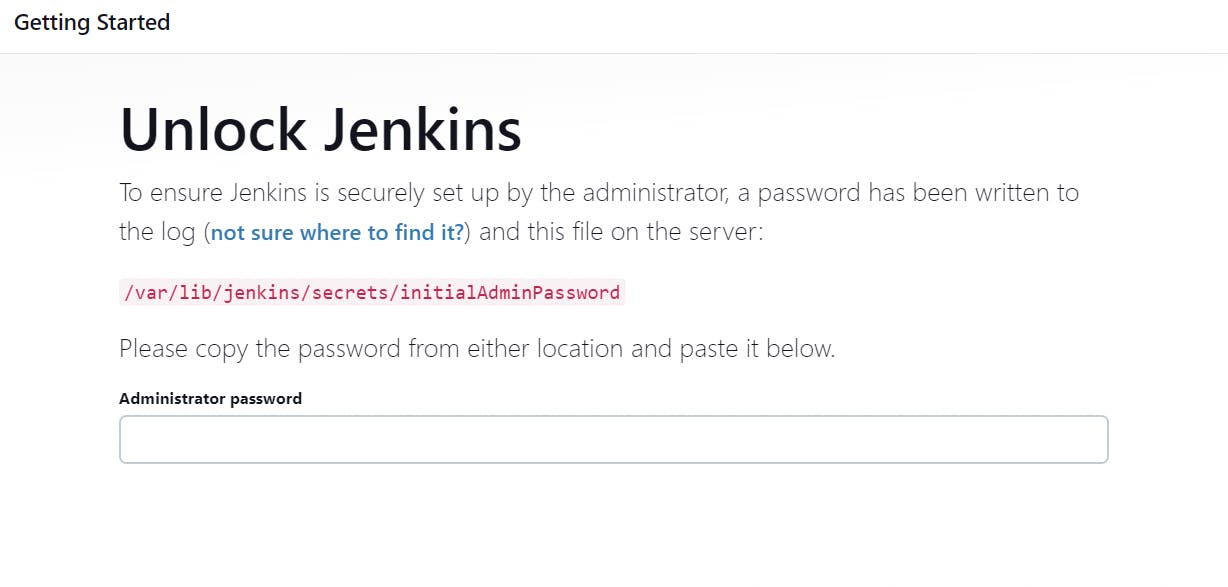
For password you need to go the mentioned path as above


Your Jenkins is now up and running.
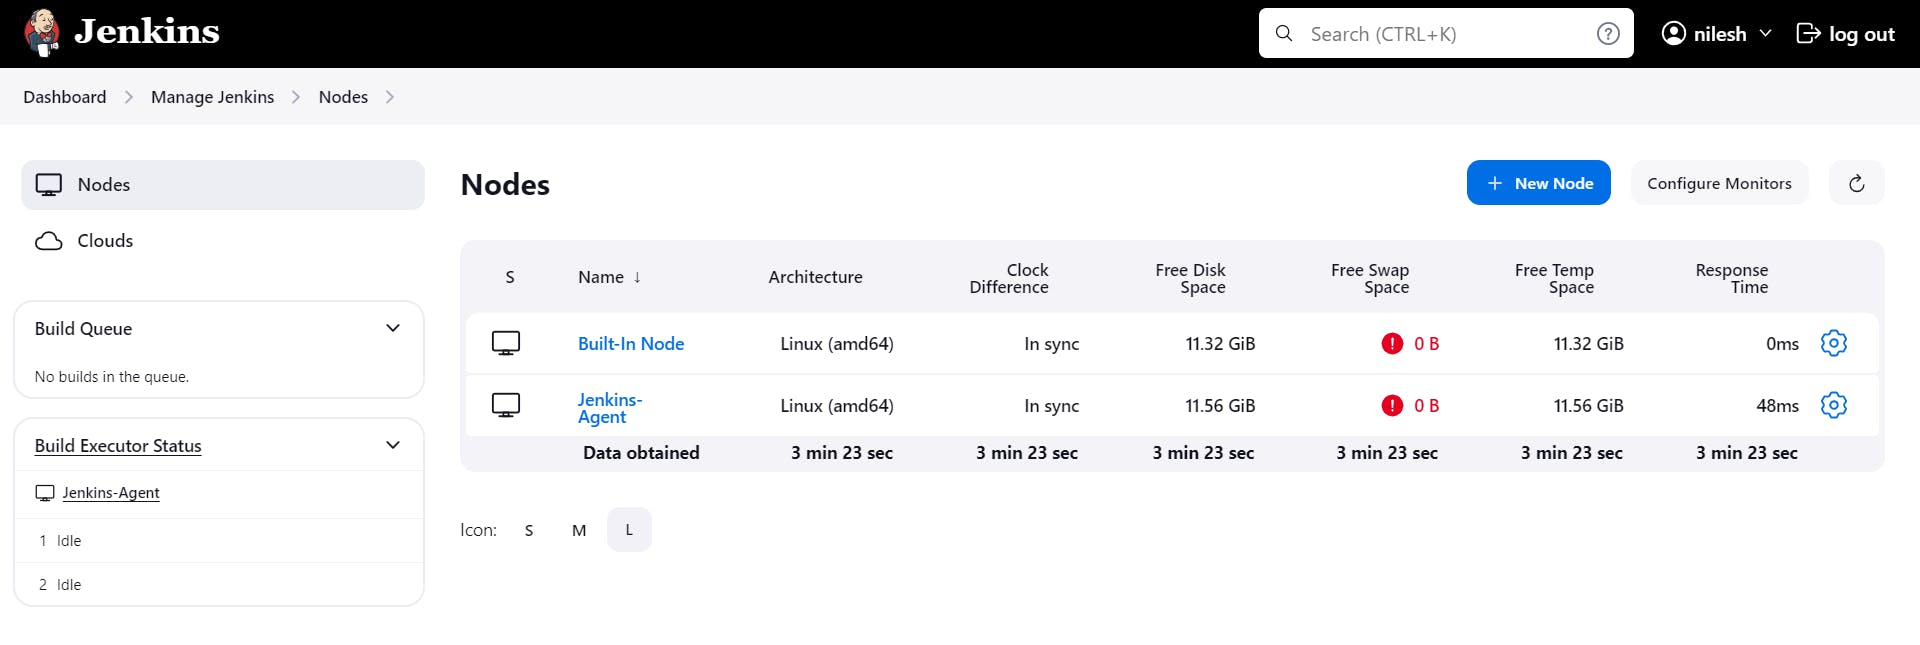
Go to the Manage Jenkins --> System Configuration --> Node --> Build in Node --> Configure --> No. of executors (should be zero) --> Save

Now go as per below attached snaps and create Jenkins-Agent node


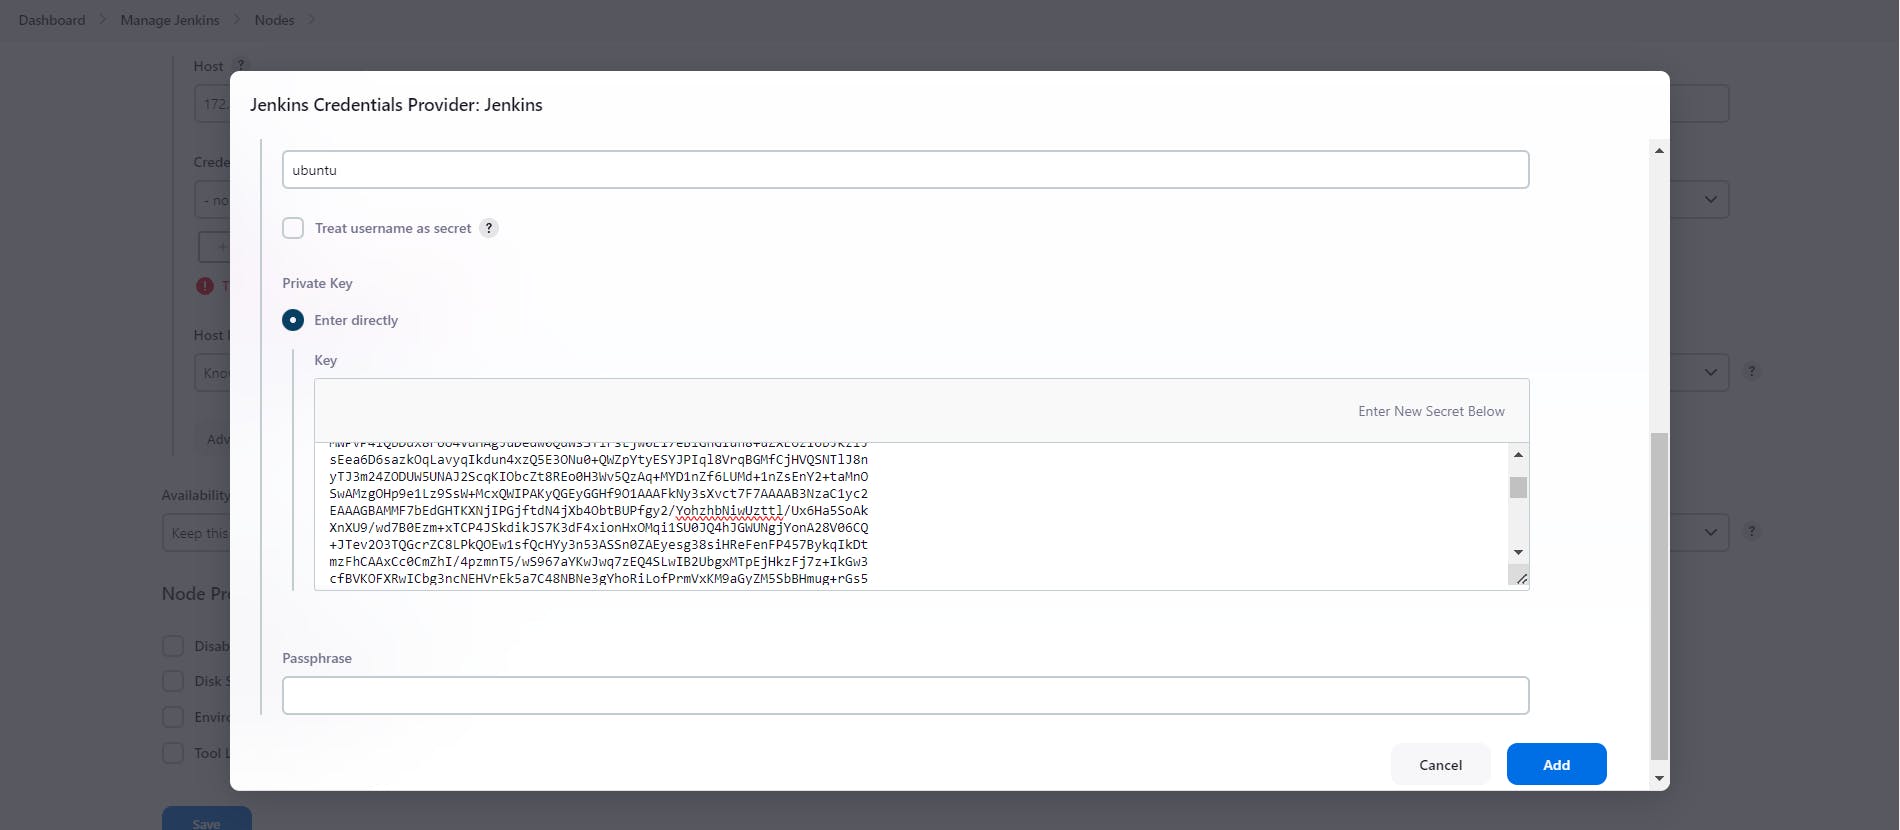
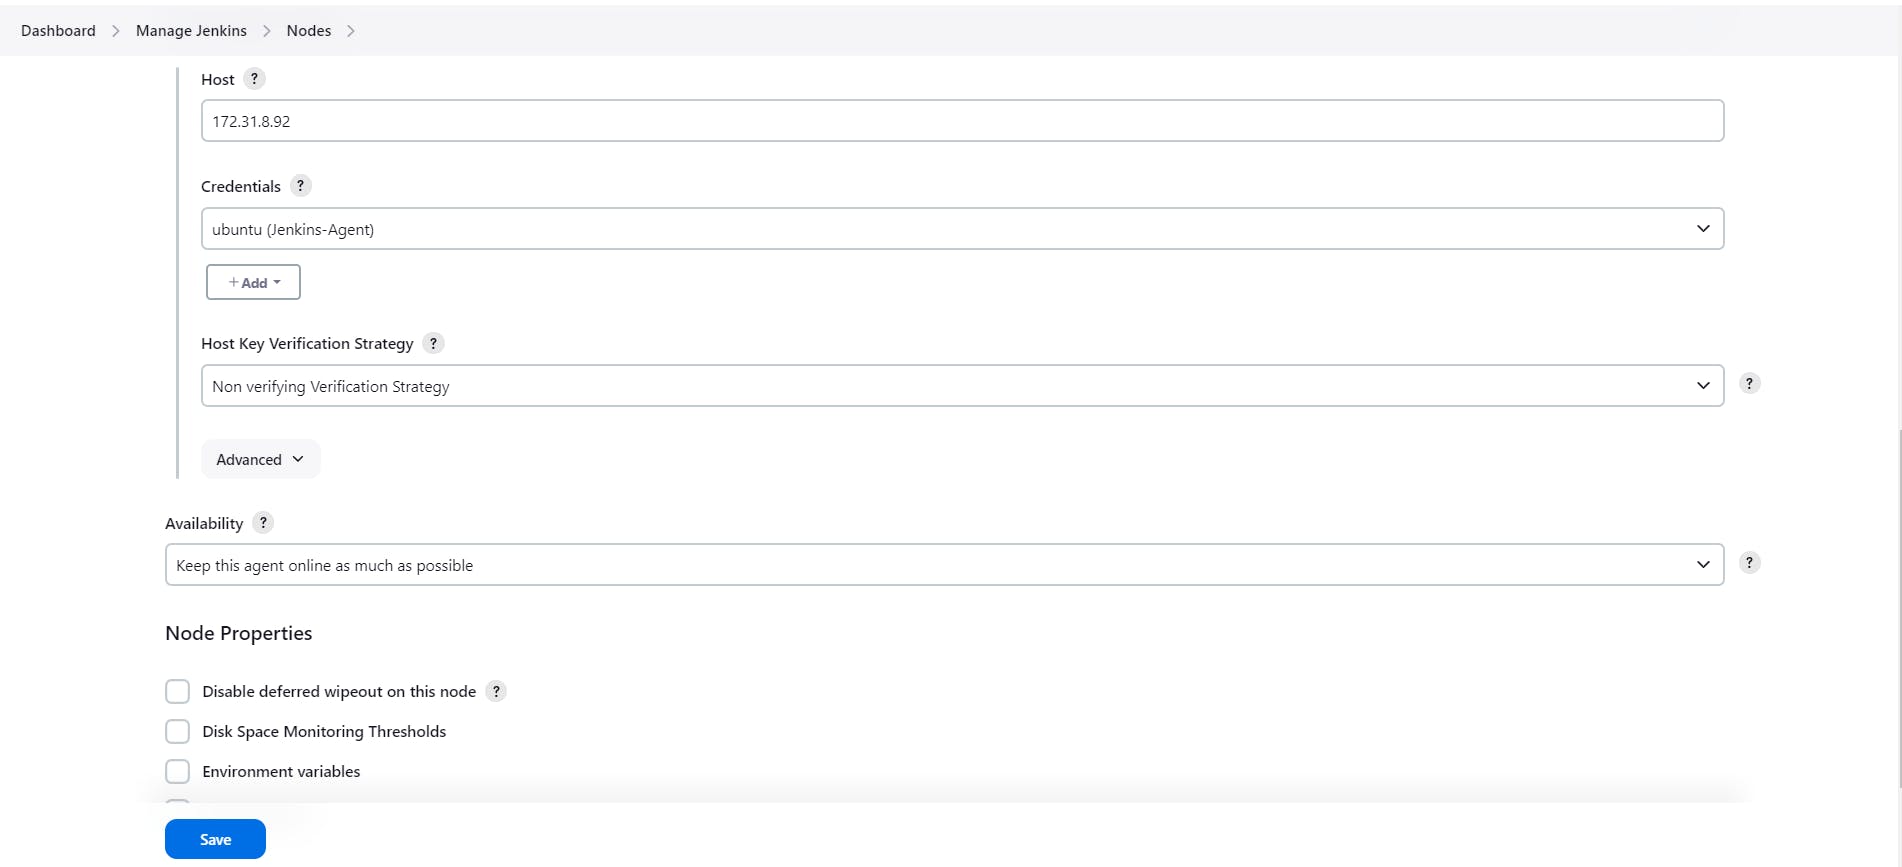
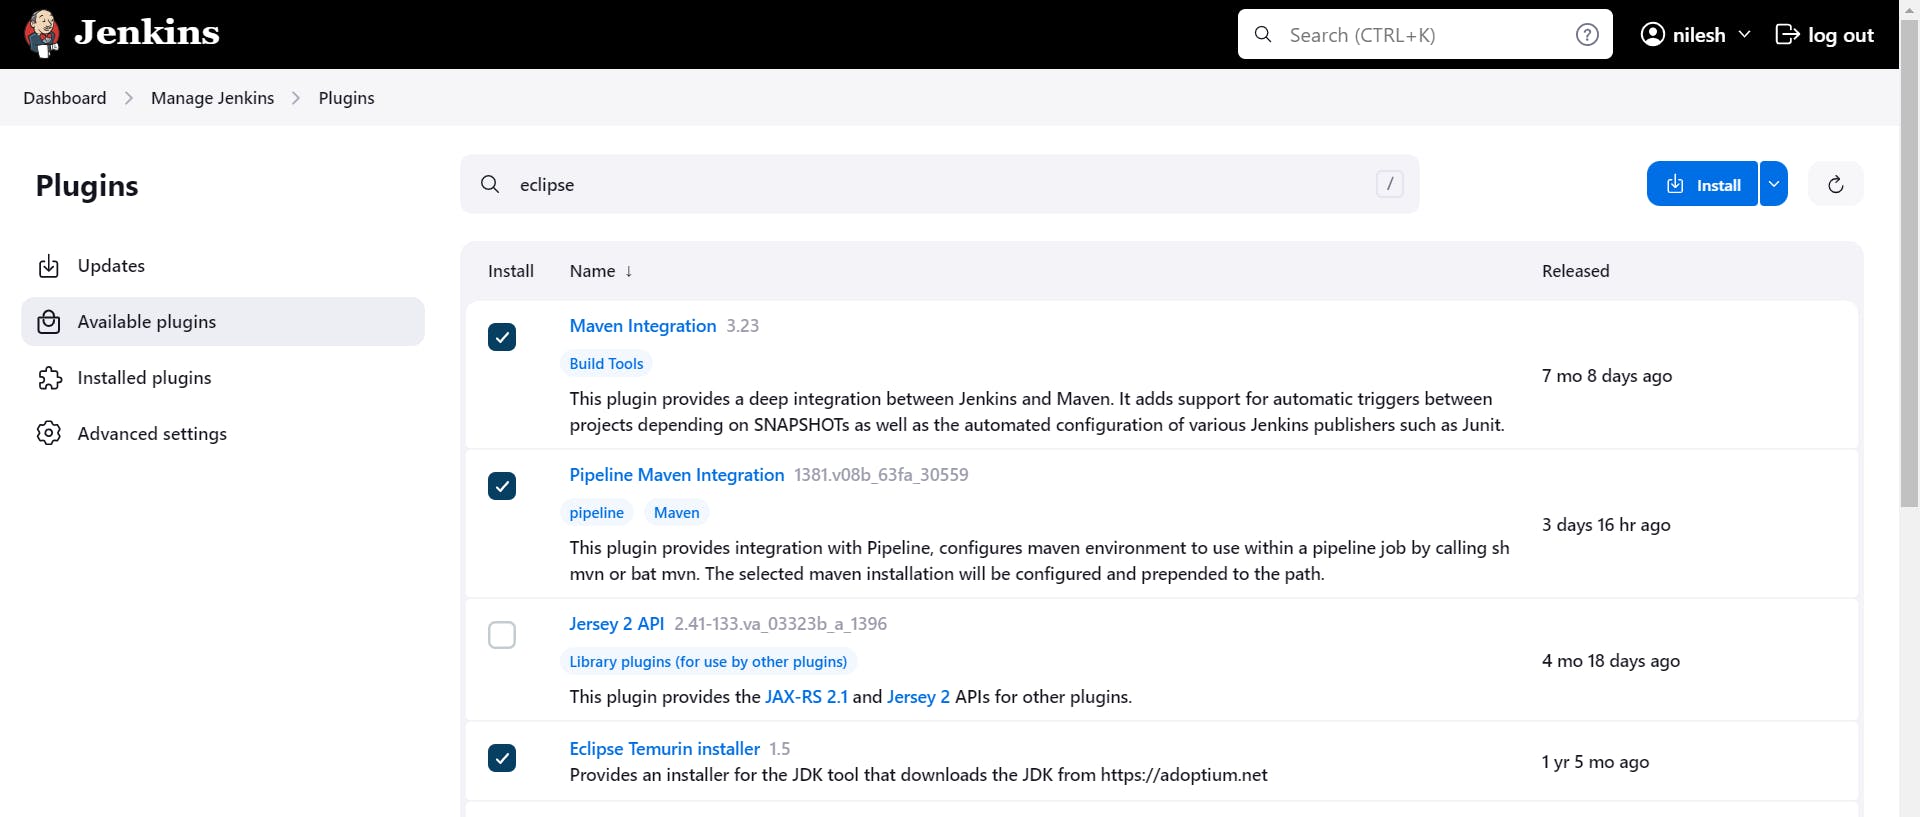
Now try to install few plugins to run the job.
Plugins Name:- Maven Integration, Pipeline Maven Integration, Eclipse Temurin Installer
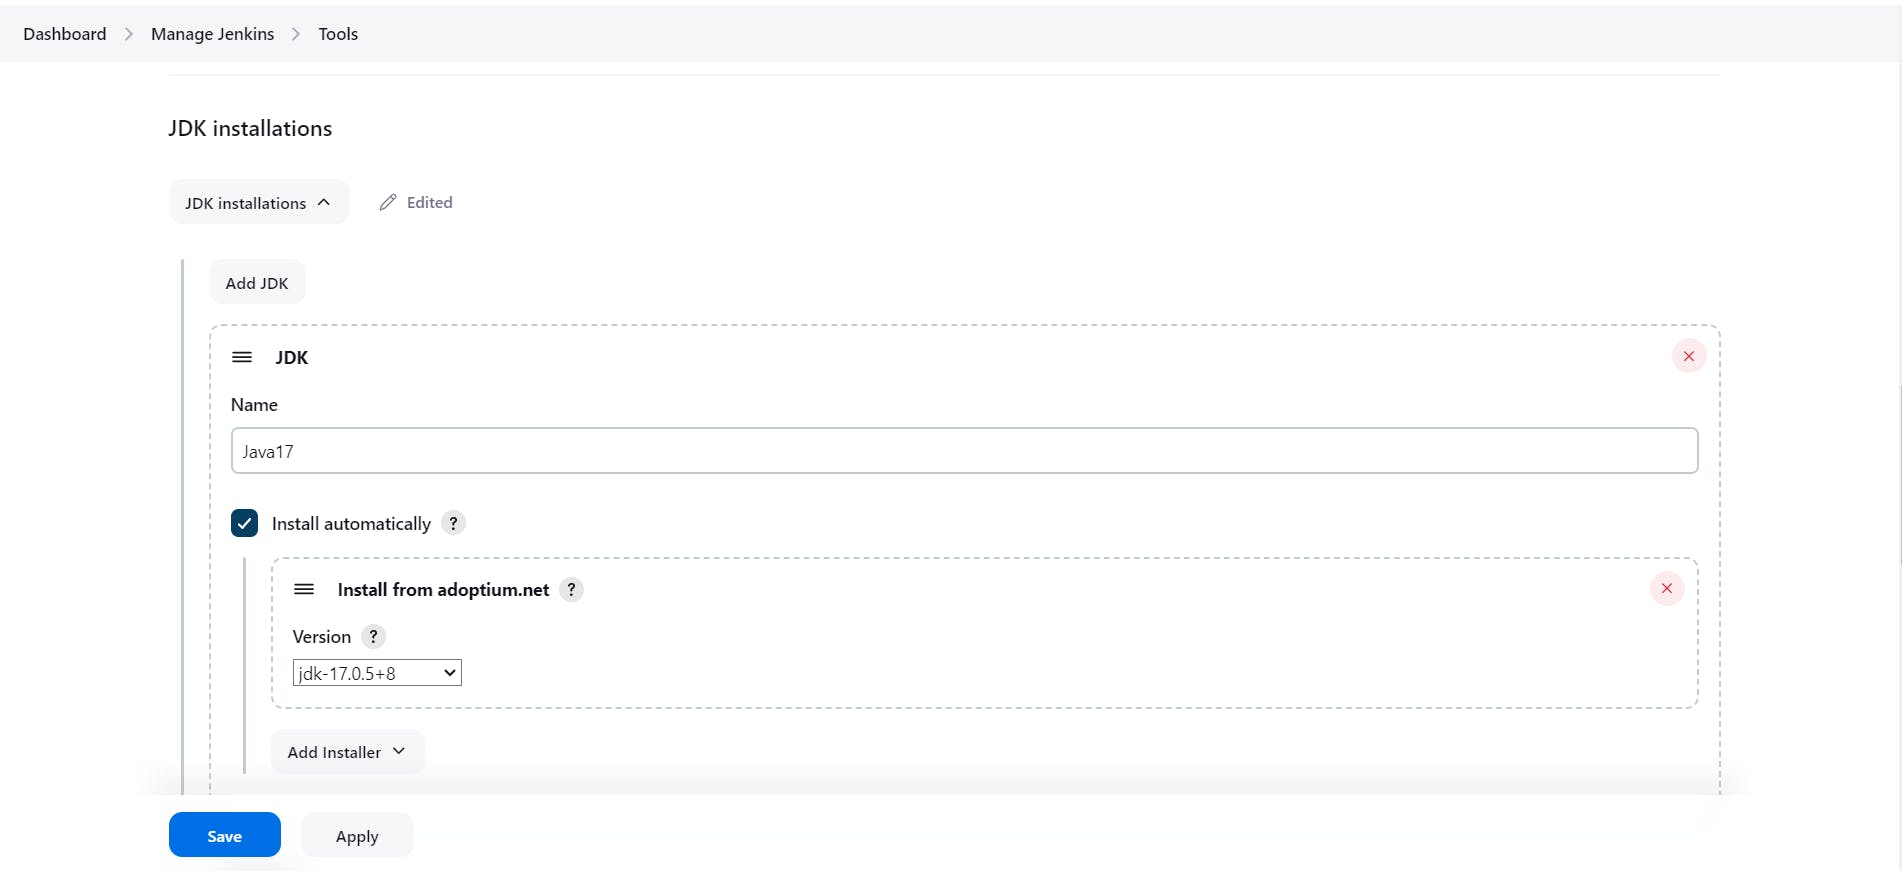
Now we have to do configuration for above one plugins

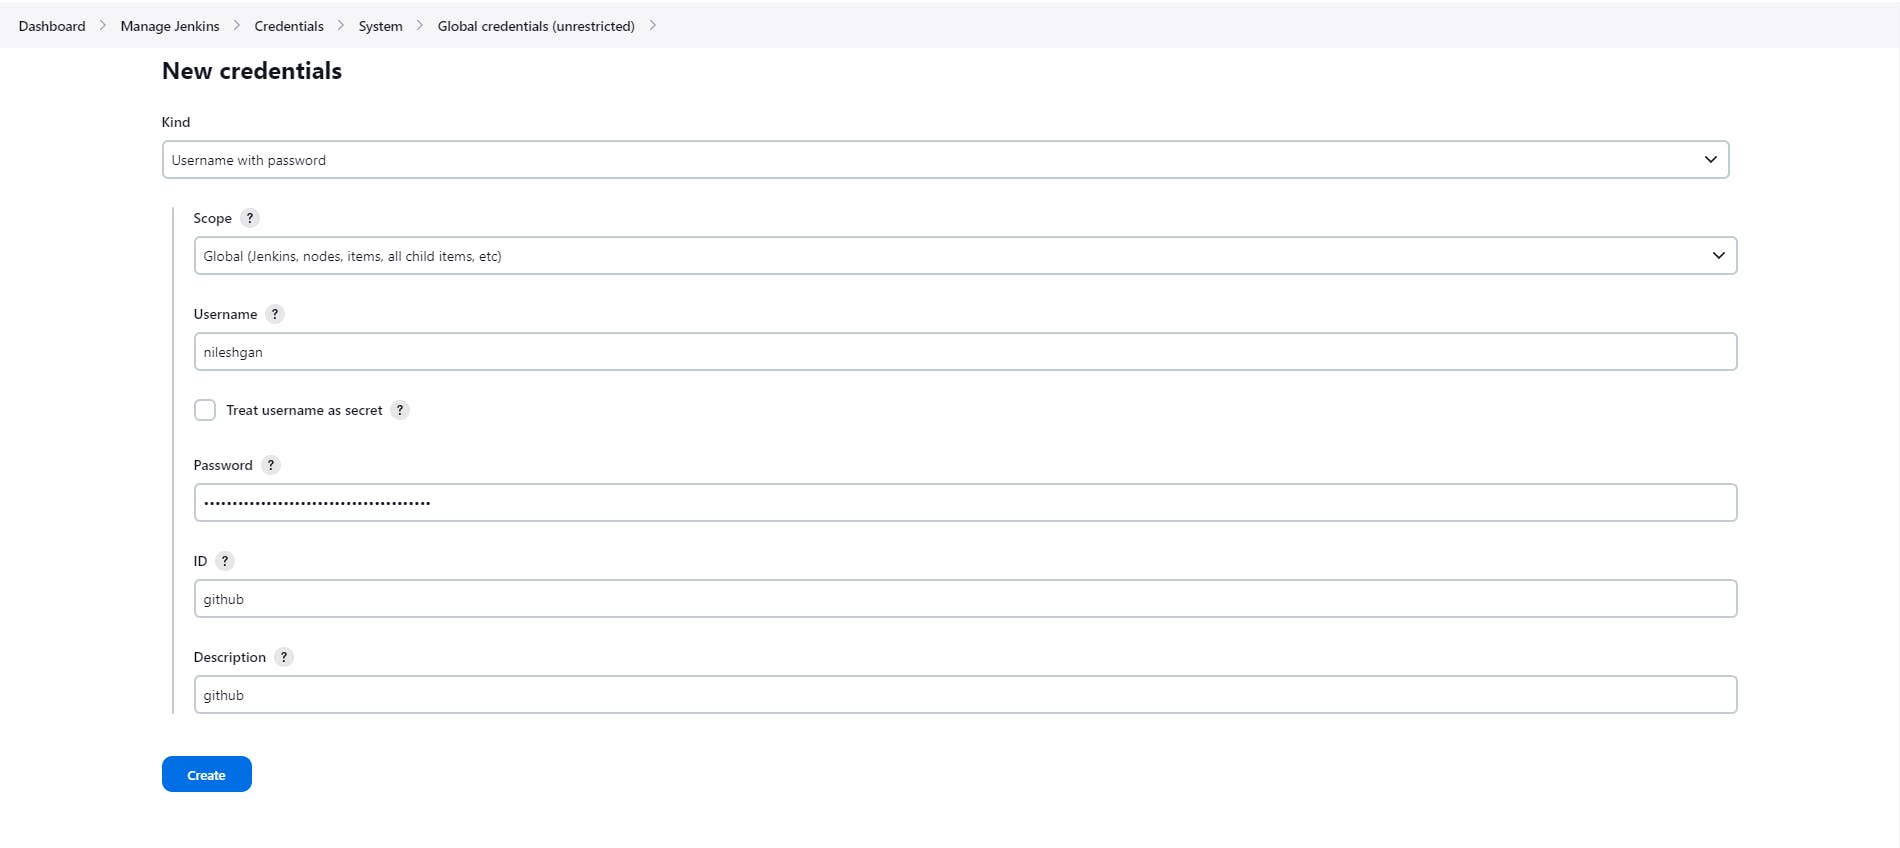
Now add tour GitHub Credentials into the Jenkins credentials section
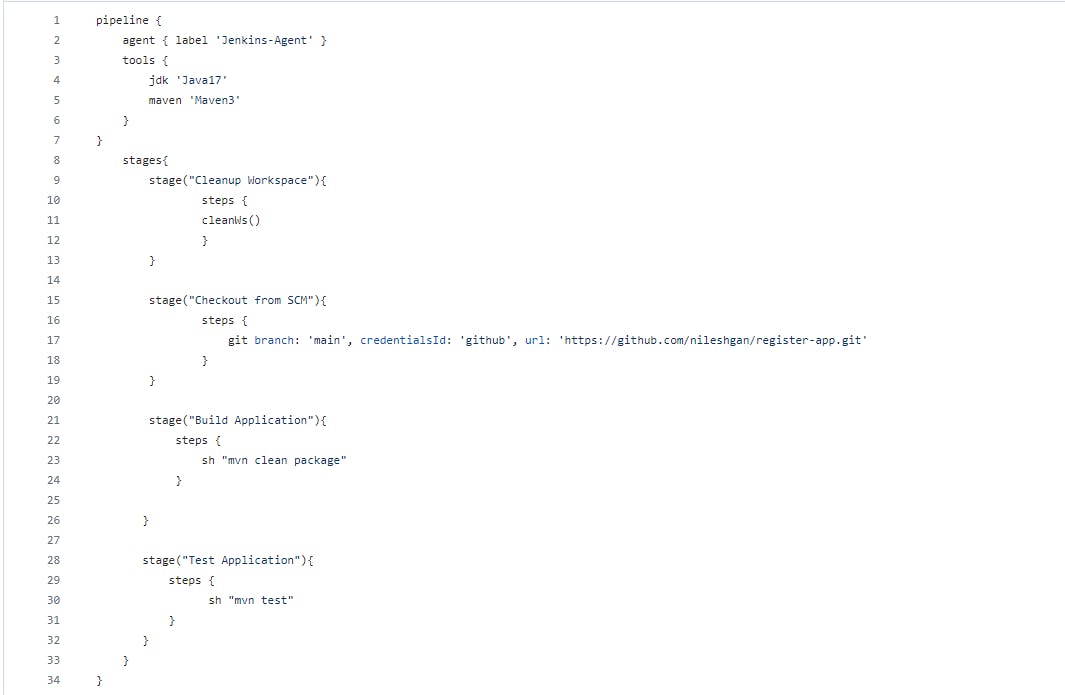
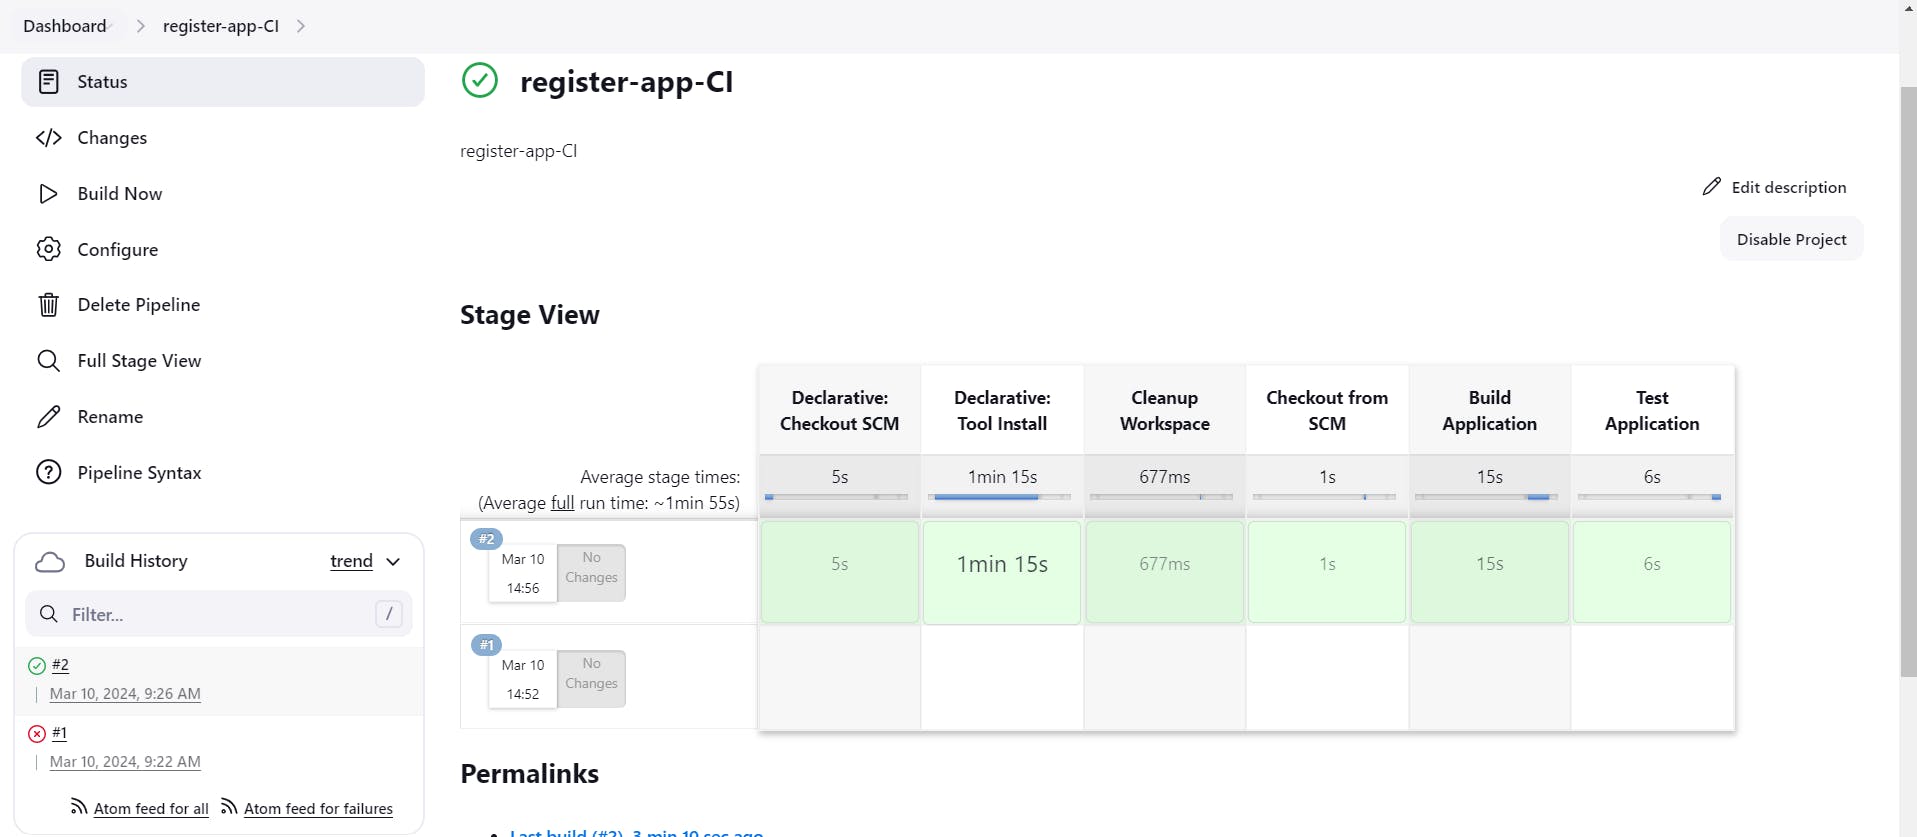
Create Pipeline script (Jenkinsfile) for build and test artifacts and create CI job on Jenkins
I have write down one simple Jenkinsfile
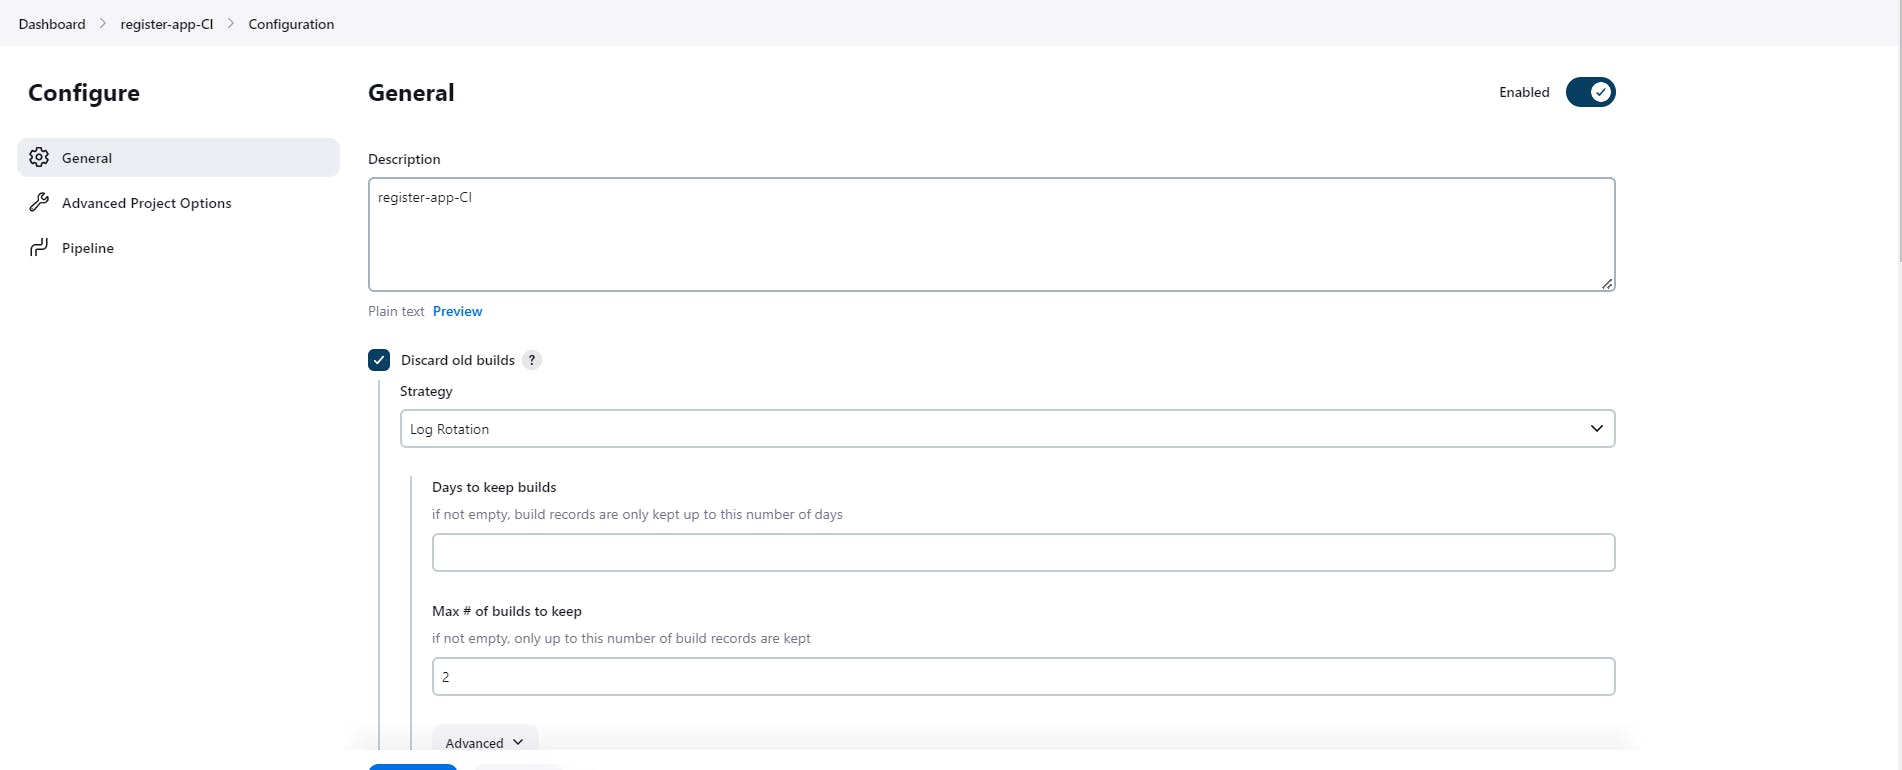
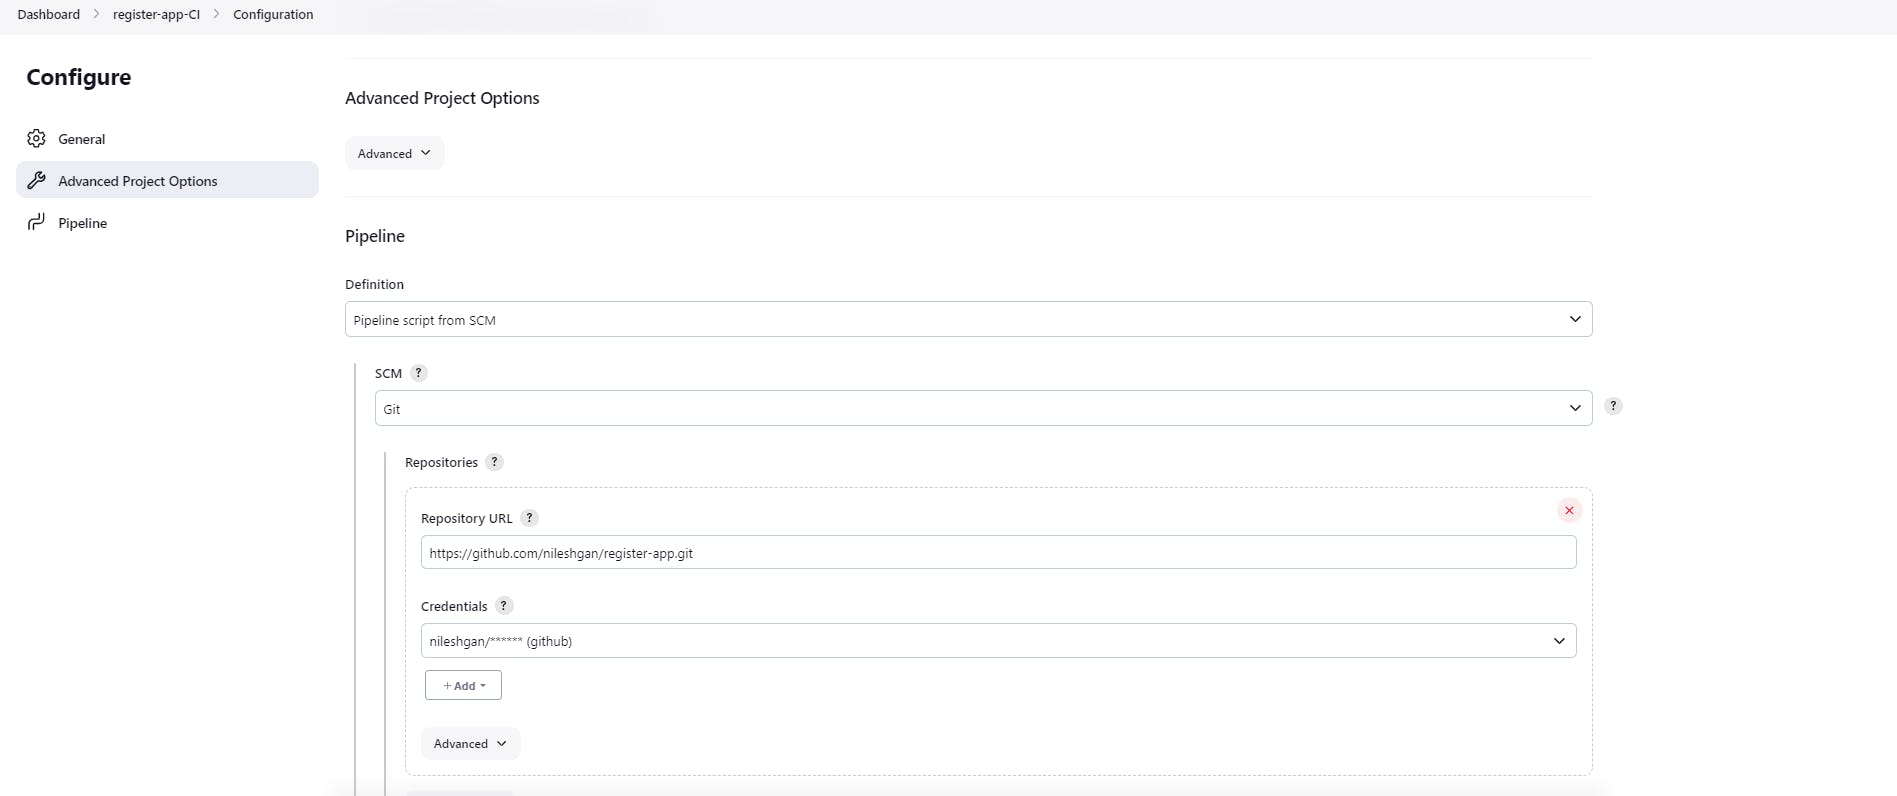
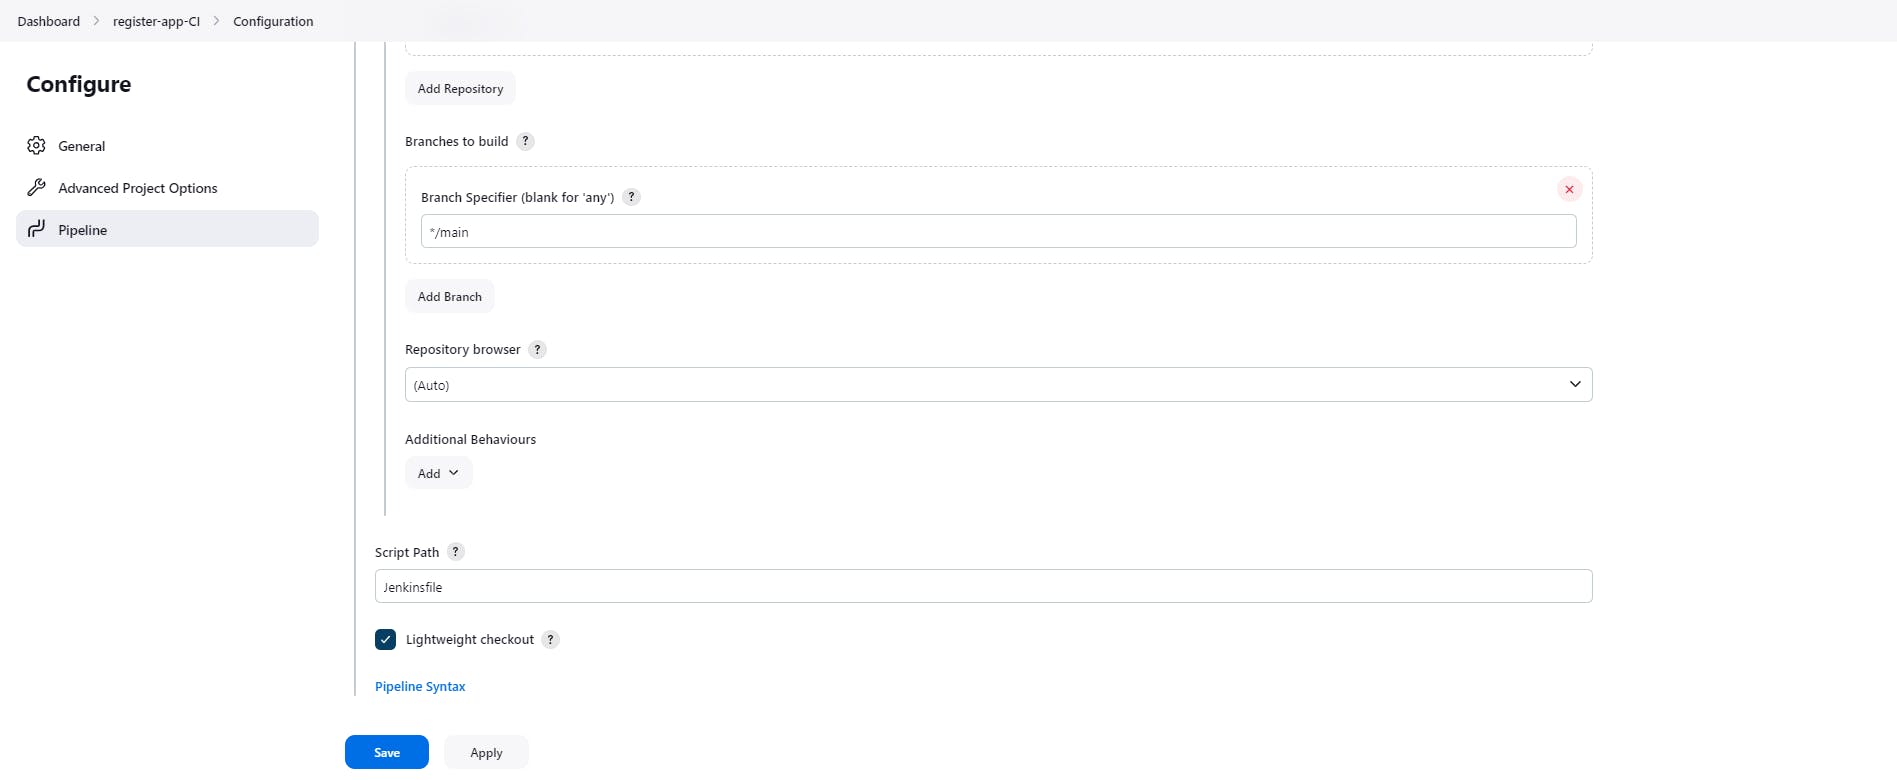
Crete a new job in Jenkins as per below snap
Build the job now.
Install and Configure the SonarQube
Create One EC2 instance with t3.medium with 15GB of storage
--> sudo apt update -y
--> sudo apt upgrade -y
--> sudo sh -c 'echo "deb apt.postgresql.org/pub/repos/apt $(lsb_release -cs)-pgdg main" > /etc/apt/sources.list.d/pgdg.list'
--> wget --quiet -O - postgresql.org/media/keys/ACCC4CF8.asc | sudo apt-key add -
--> sudo apt-get update
--> sudo apt-get -y install postgresql
--> sudo systemctl enable postgresql

Now I will create the database for the SonarQube
Set the password for postgres

Now login with postgres username using command "su - postgres"
Create one user with name sonar using command "createuser sonar"

ALTER USER sonar WITH ENCRYPTED password 'sonar';
CREATE DATABASE sonarqube OWNER sonar;
grant all privileges on DATABASE sonarqube to sonar;
\q
exit

Ok so database for the SonarQube has been created.
I will now go ahead and add the adaptium repository. For this use below commands
--> sudo bash
--> wget -O - packages.adoptium.net/artifactory/api/gpg/k.. | tee /etc/apt/keyrings/adoptium.asc
--> echo "deb [signed-by=/etc/apt/keyrings/adoptium.asc] packages.adoptium.net/artifactory/deb $(awk -F= '/^VERSION_CODENAME/{print$2}' /etc/os-release) main" | tee /etc/apt/sources.list.d/adoptium.list

Now i will add Java. For this use below commands
sudo apt update -y
sudo apt upgrade -y
sudo apt install temurin-17-jdk -y
update-alternatives --config java
/usr/bin/java --version
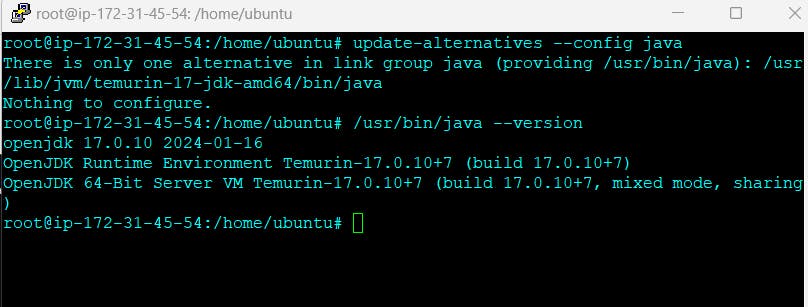
So this is the version of the Java which is installed
Now i need to do some Linux Kernel tuning so first of all I will increase the limits
I will open the file "sudo vim /etc/security/limits.conf" and adding below 2 lines
sonarqube - nofile 65536
sonarqube - nproc 4096
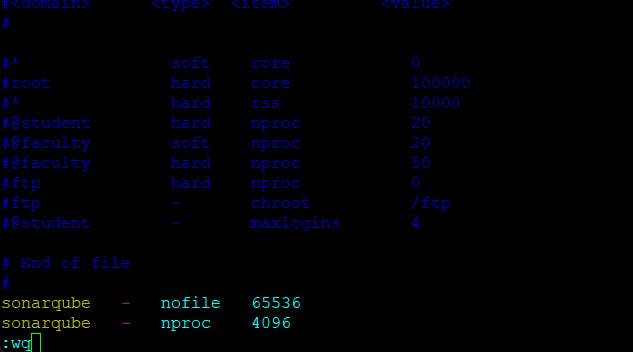
Now I will increase the mapped memory regions, so we need open below file
sudo vim /etc/sysctl.conf and Paste the below values at the bottom of the file vm.max_map_count = 262144
Now we have to reboot our system.
Let's go ahead and install the SonarQube in the system for this you need use below commands,
--> sudo wget https://binaries.sonarsource.com/Distribution/sonarqube/sonarqube-9.9.0.65466.zip
--> sudo apt install unzip
--> sudo unzip sonarqube-9.9.0.65466.zip -d /opt
--> sudo mv /opt/sonarqube-9.9.0.65466 /opt/sonarqube
Now we need to create the user and set permission for that user

Update Sonarqube properties with DB credentials
sudo vim /opt/sonarqube/conf/sonar.properties //Find and replace the below values, you might need to add the sonar.jdbc.url
sonar.jdbc.username=sonar
sonar.jdbc.password=sonar sonar.jdbc.url=jdbc:postgresql://localhost:5432/sonarqube
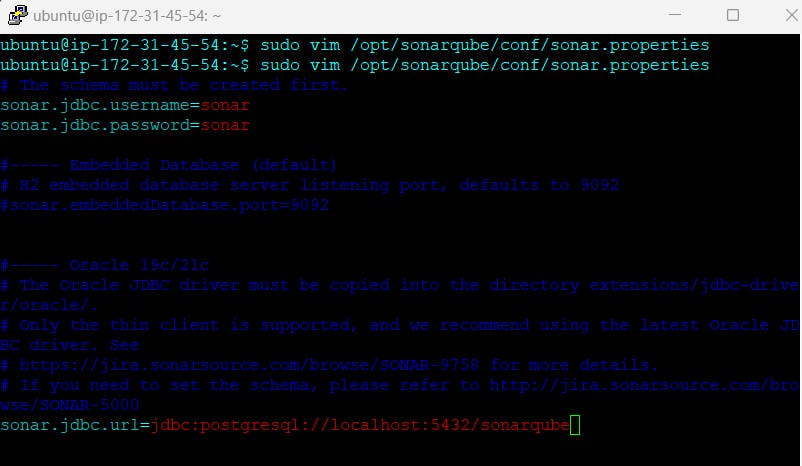
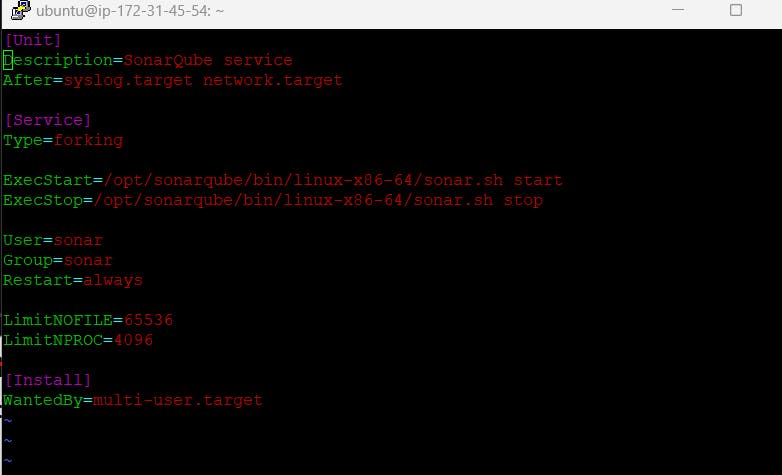
Now we need to create service for Sonarqube
sudo vim /etc/systemd/system/sonar.service and Paste the below into the file
[Unit]
Description=SonarQube service
After=syslog.target network.target
[Service]
Type=forking
ExecStart=/opt/sonarqube/bin/linux-x86-64/sonar.sh start ExecStop=/opt/sonarqube/bin/linux-x86-64/sonar.sh stop
User=sonar
Group=sonar
Restart=always
LimitNOFILE=65536
LimitNPROC=4096
[Install]
WantedBy=multi-user.target
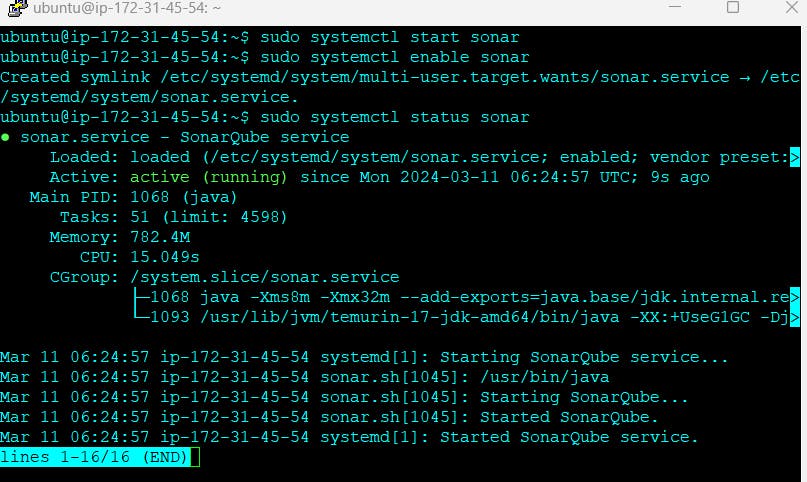
Now I will start the SonarQube and I will enable the service
--> sudo systemctl start sonar
--> sudo systemctl enable sonar
--> sudo systemctl status sonar
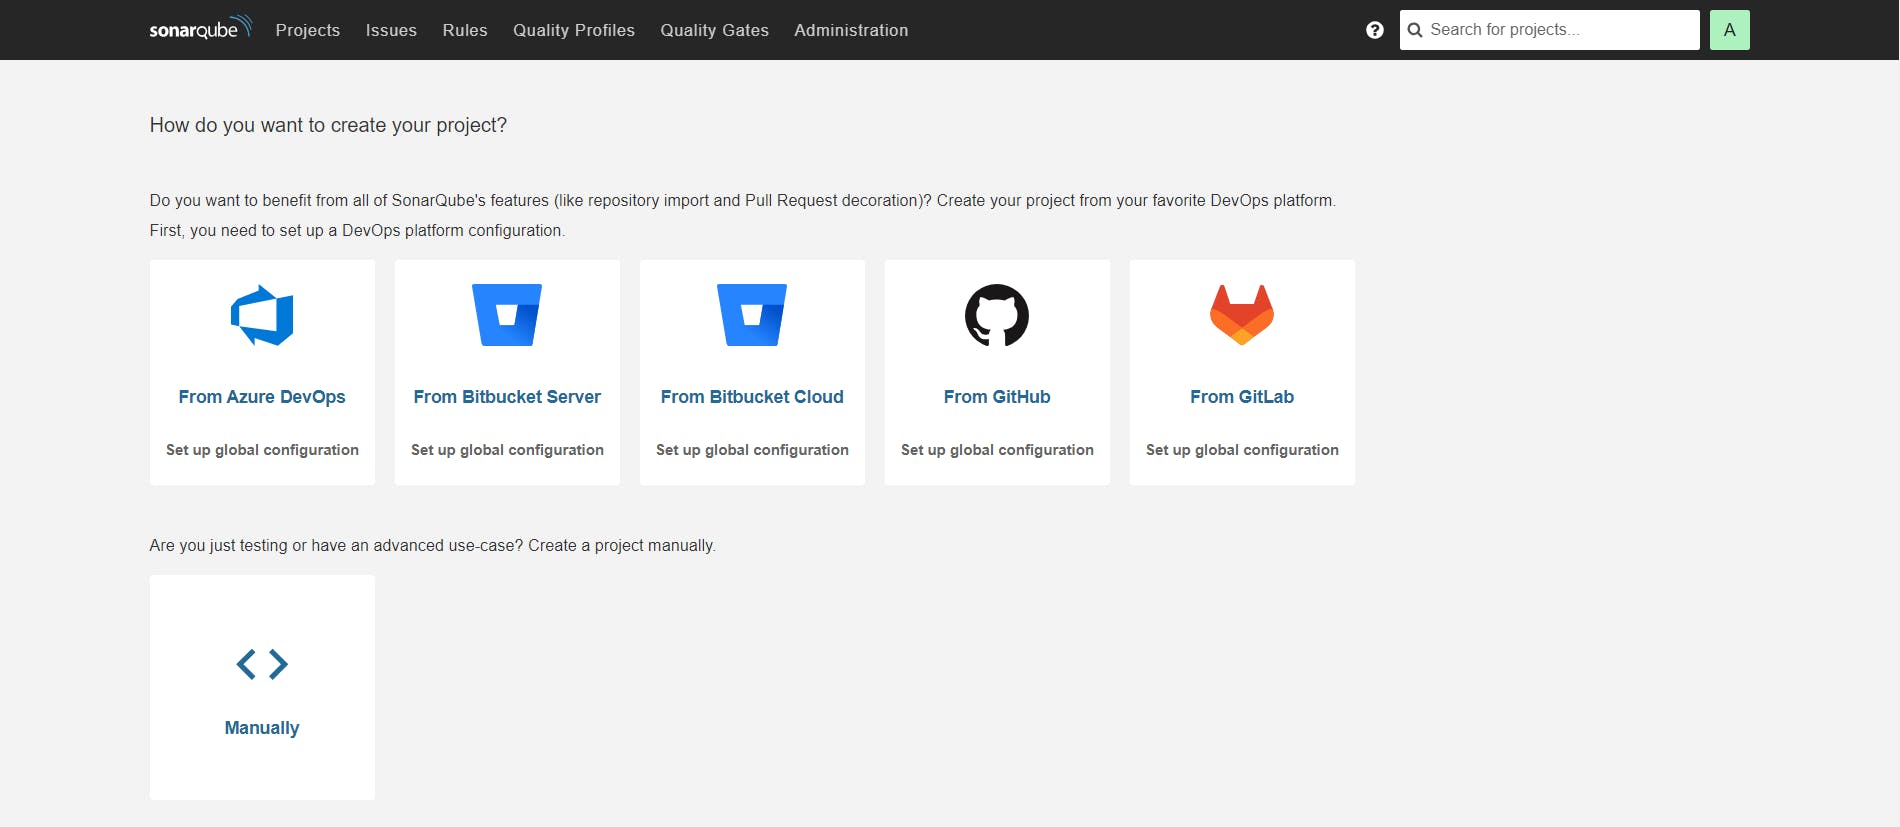
Open the Sonarqube with port number 9000. Make sure this port number must be open in EC2 instance security group
Integrate SonarQube with Jenkins
To integrate SonarQube with Jenkins we need to generate token in Sonaeqube and then create credentials in Jenkins.
Let's create the token first in SonarQube

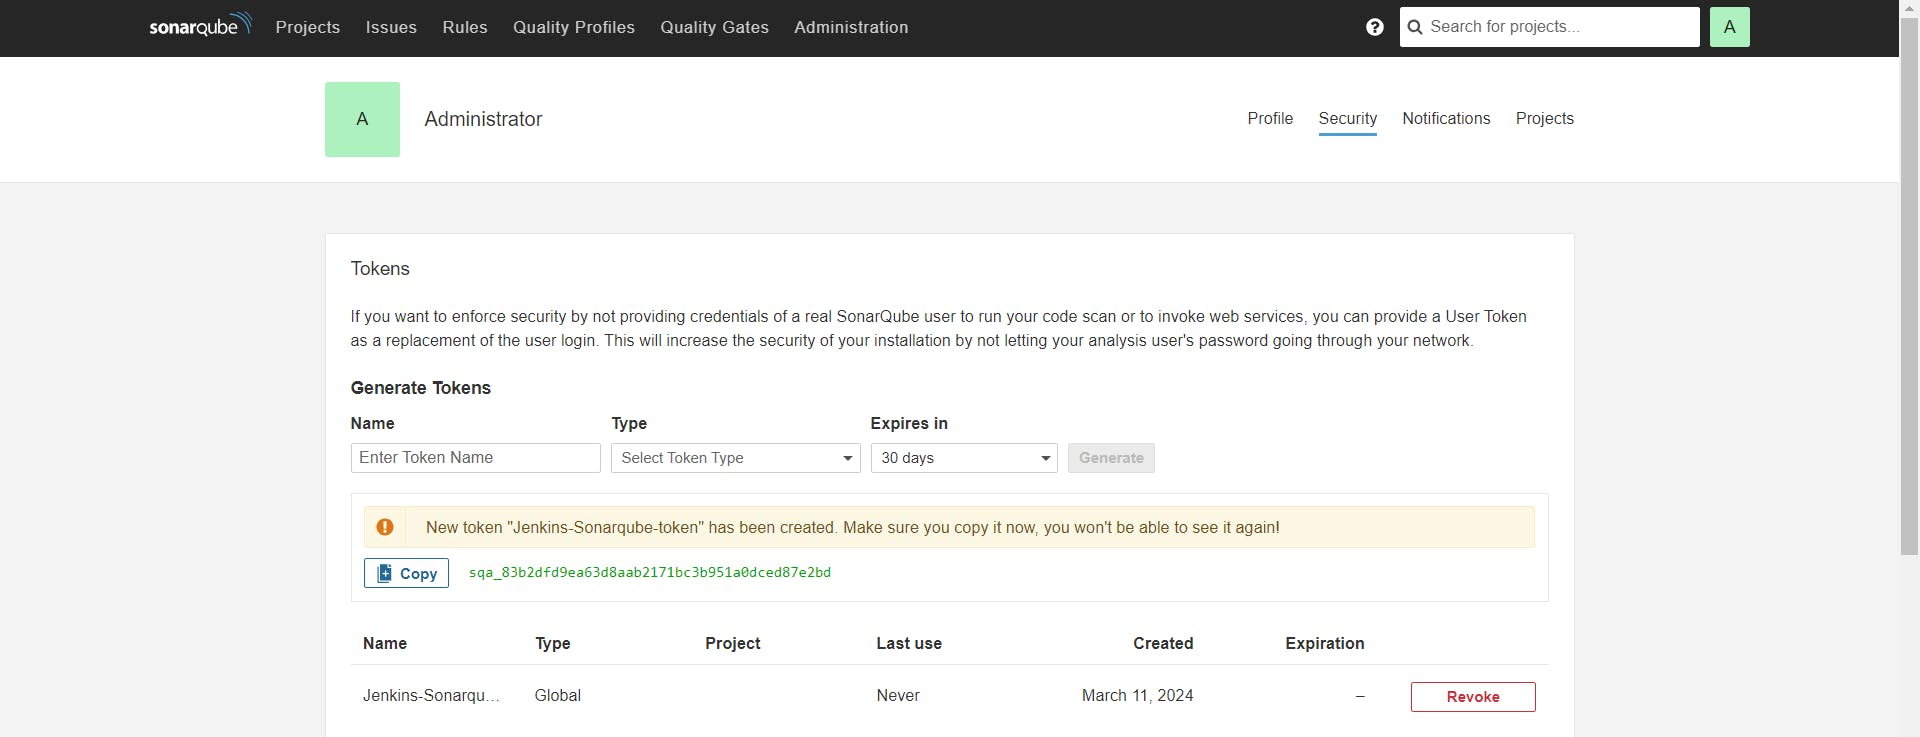
Copy the token and create credentials in Jenkins

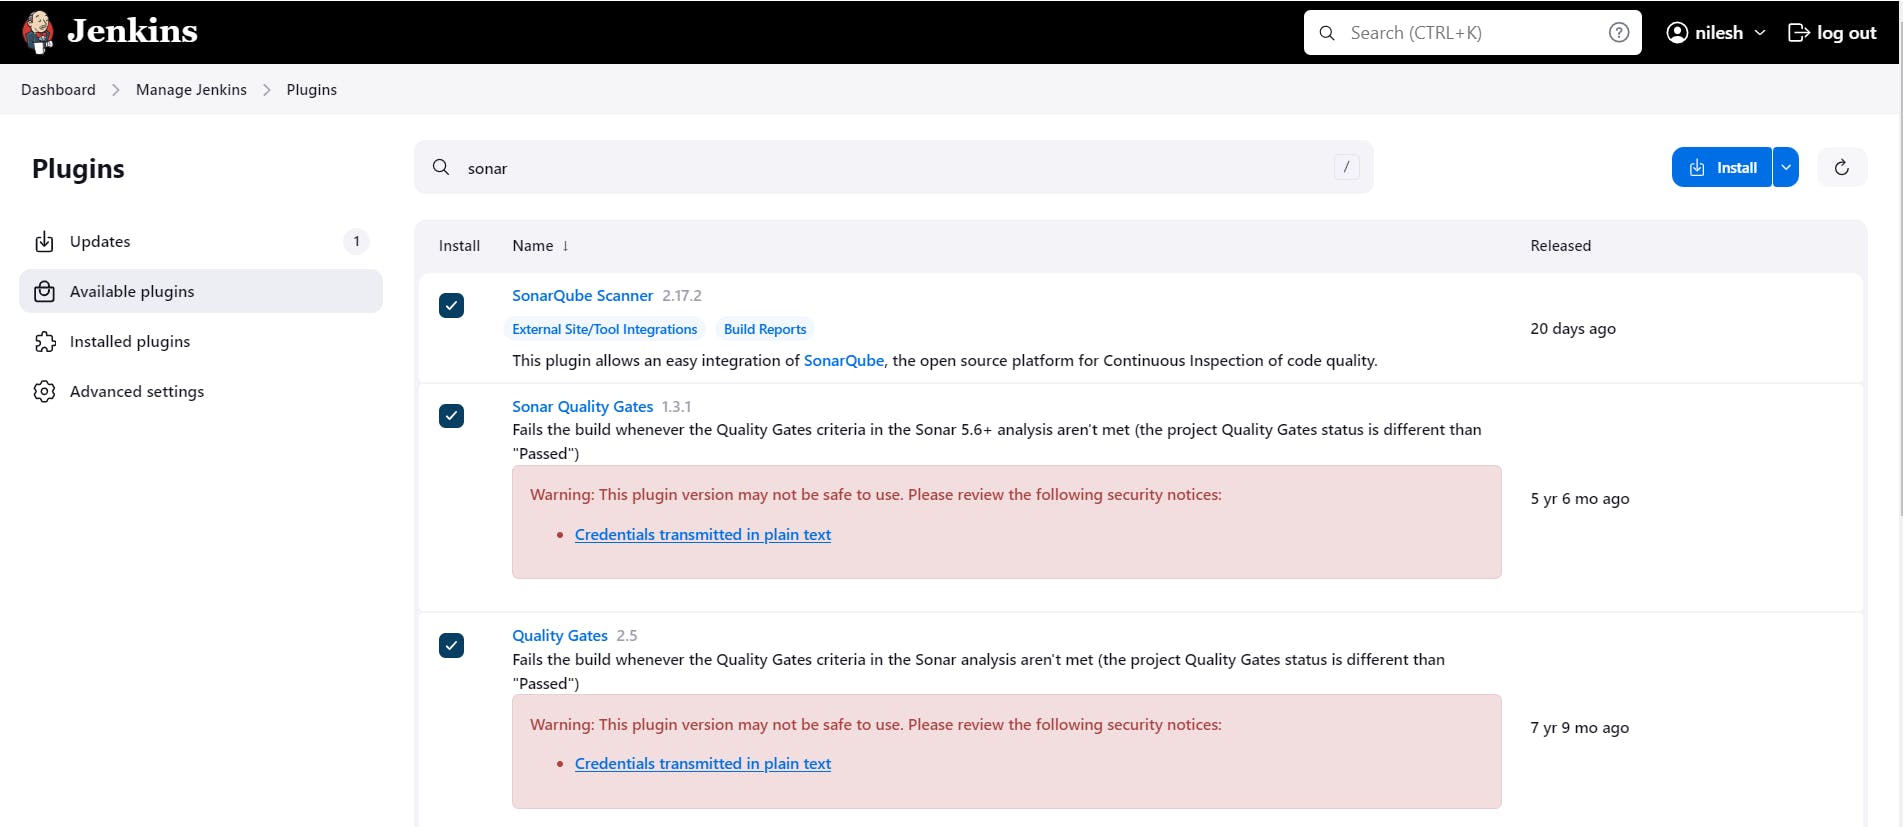
Now install few plugins related to the SonarQube
Now I am going to add Sonarqube into my Jenkins
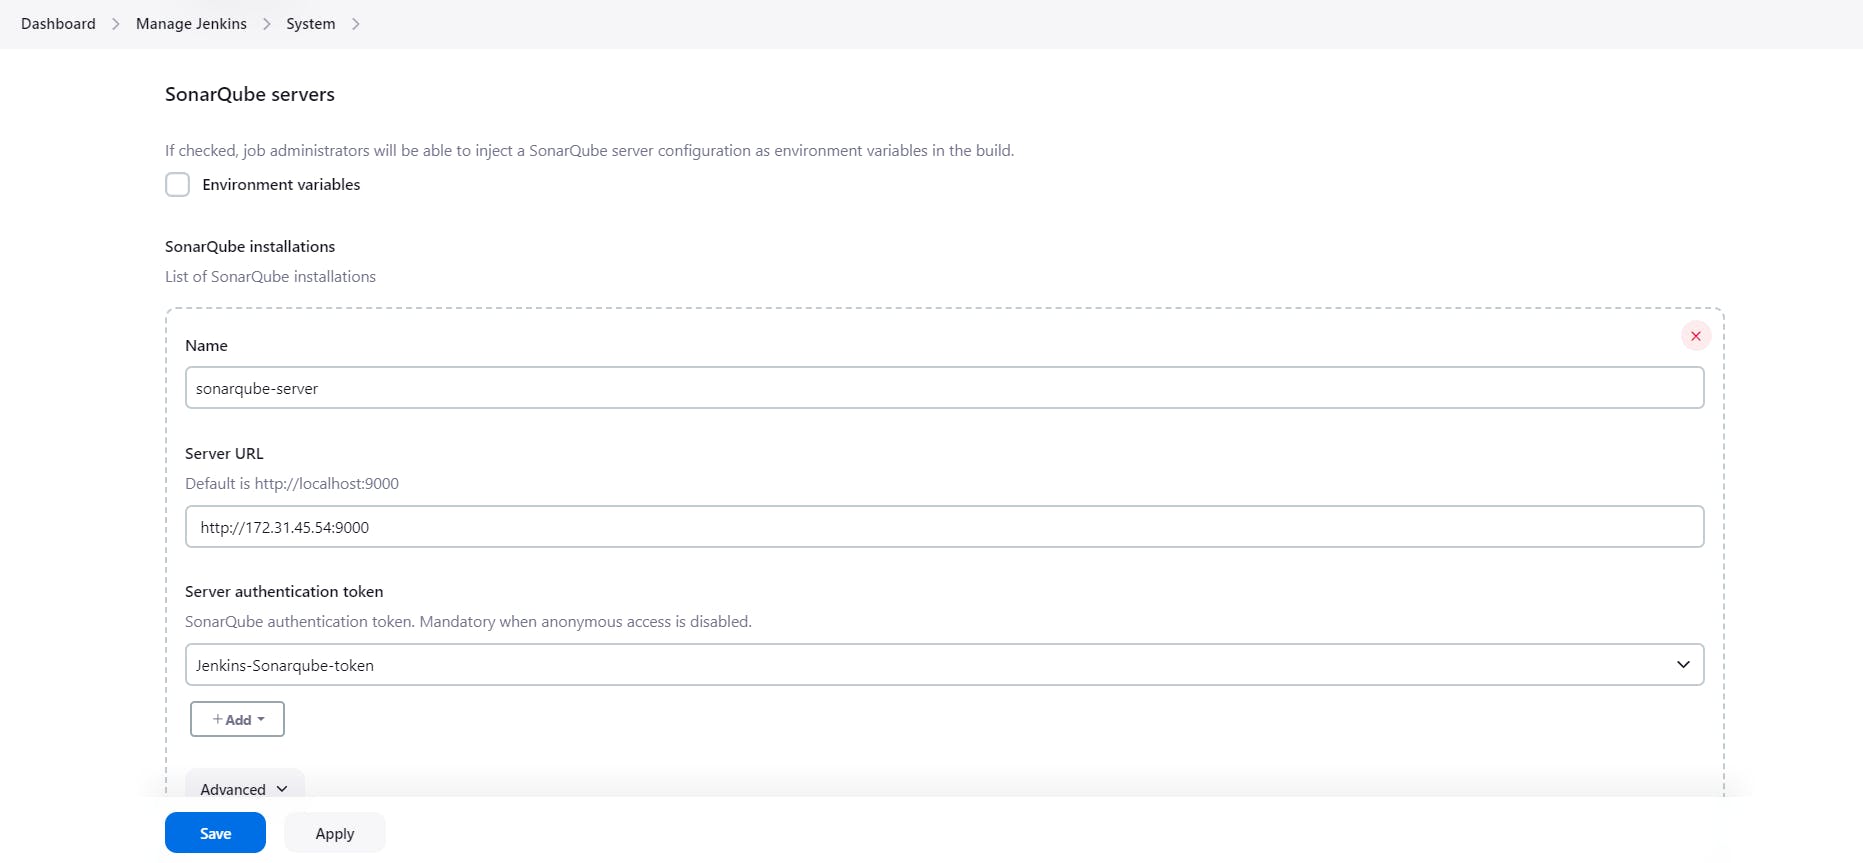
Where, http://172.31.45.54:9000 ; 172.31.45.54 this is the private IP address of the sonarqube ec2 instance
Now we need to add sonarqube scanner into the Jenkins

Setup is done for the Sonarqube with Jenkins
Now we need to add the stage for the SonarQube analysis in my Pipeline Script
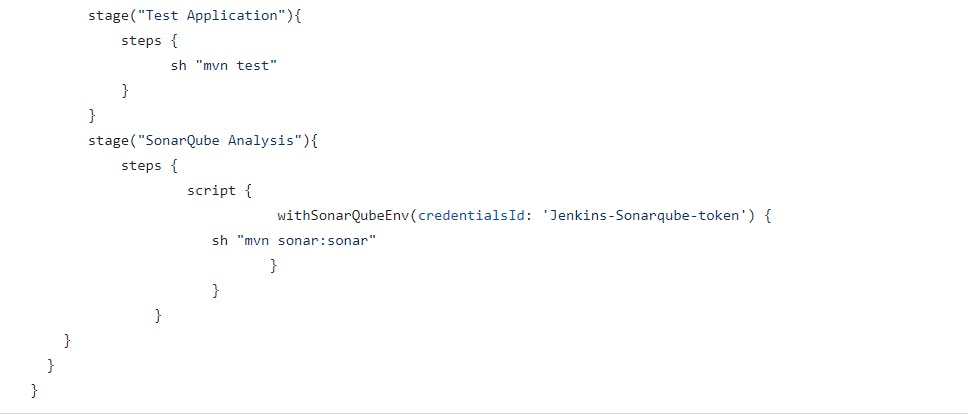
Go to the Jenkins and build the job.

If you go into SonarQube page you will see project

We need to create Sonarqube Webhook, without Sonarqube Webhook your pipeline will be fail.
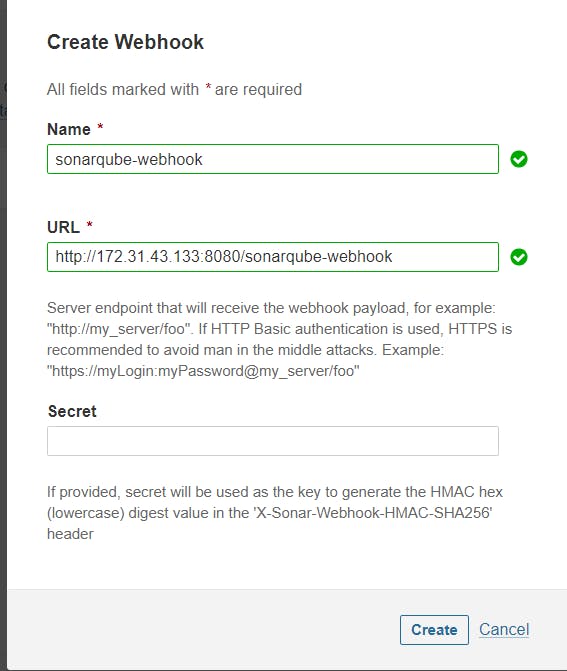
where, 172.31.43.133 = Private ip address of the Jenkins-Master ec2 instance
Now I will add one more stage into my Jenkinsfile
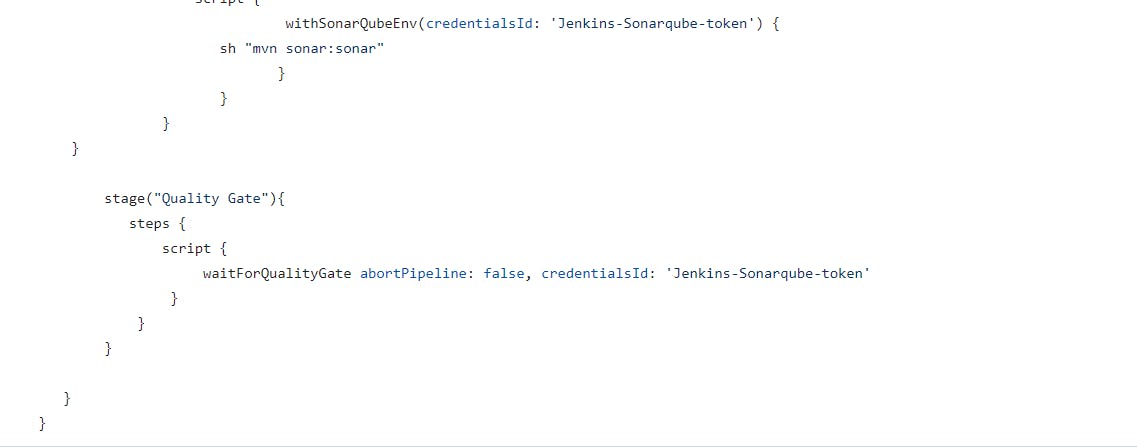
Now i will build my Jenkins job

Build and Push Docker Image Using Pipeline Script
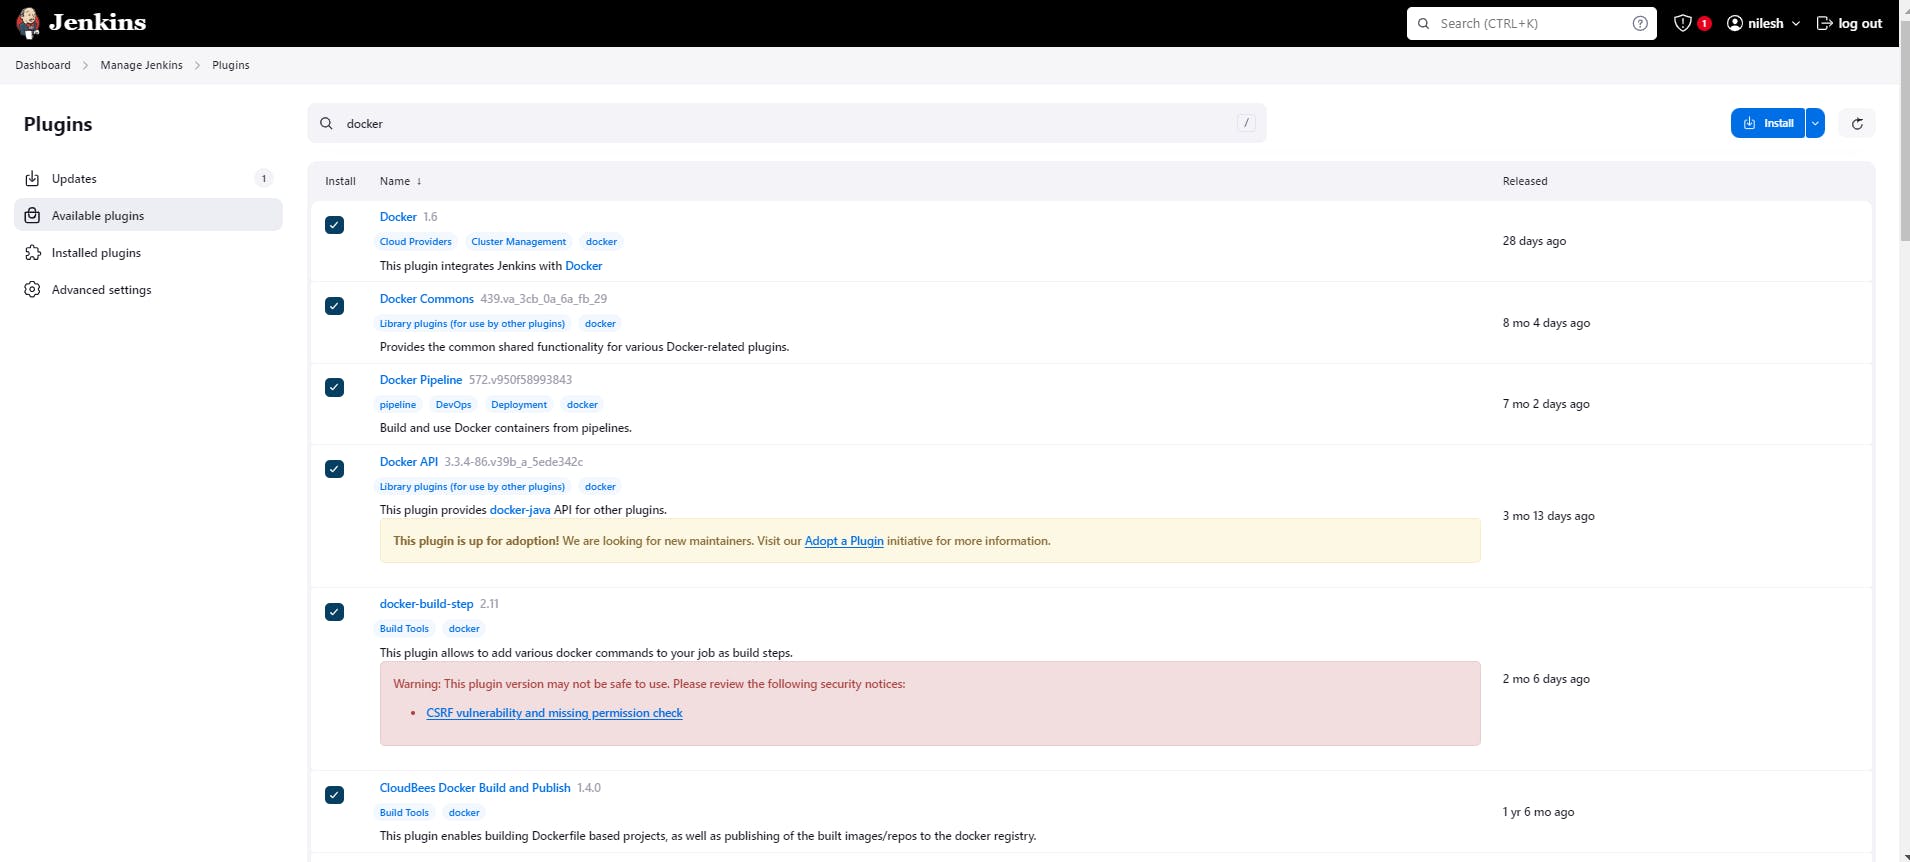
We need to install few plugins related to the Docker
Now we need add DockerHub credentials into the Jenkins

Now we need to add the environment variables into the Jenkinsfile

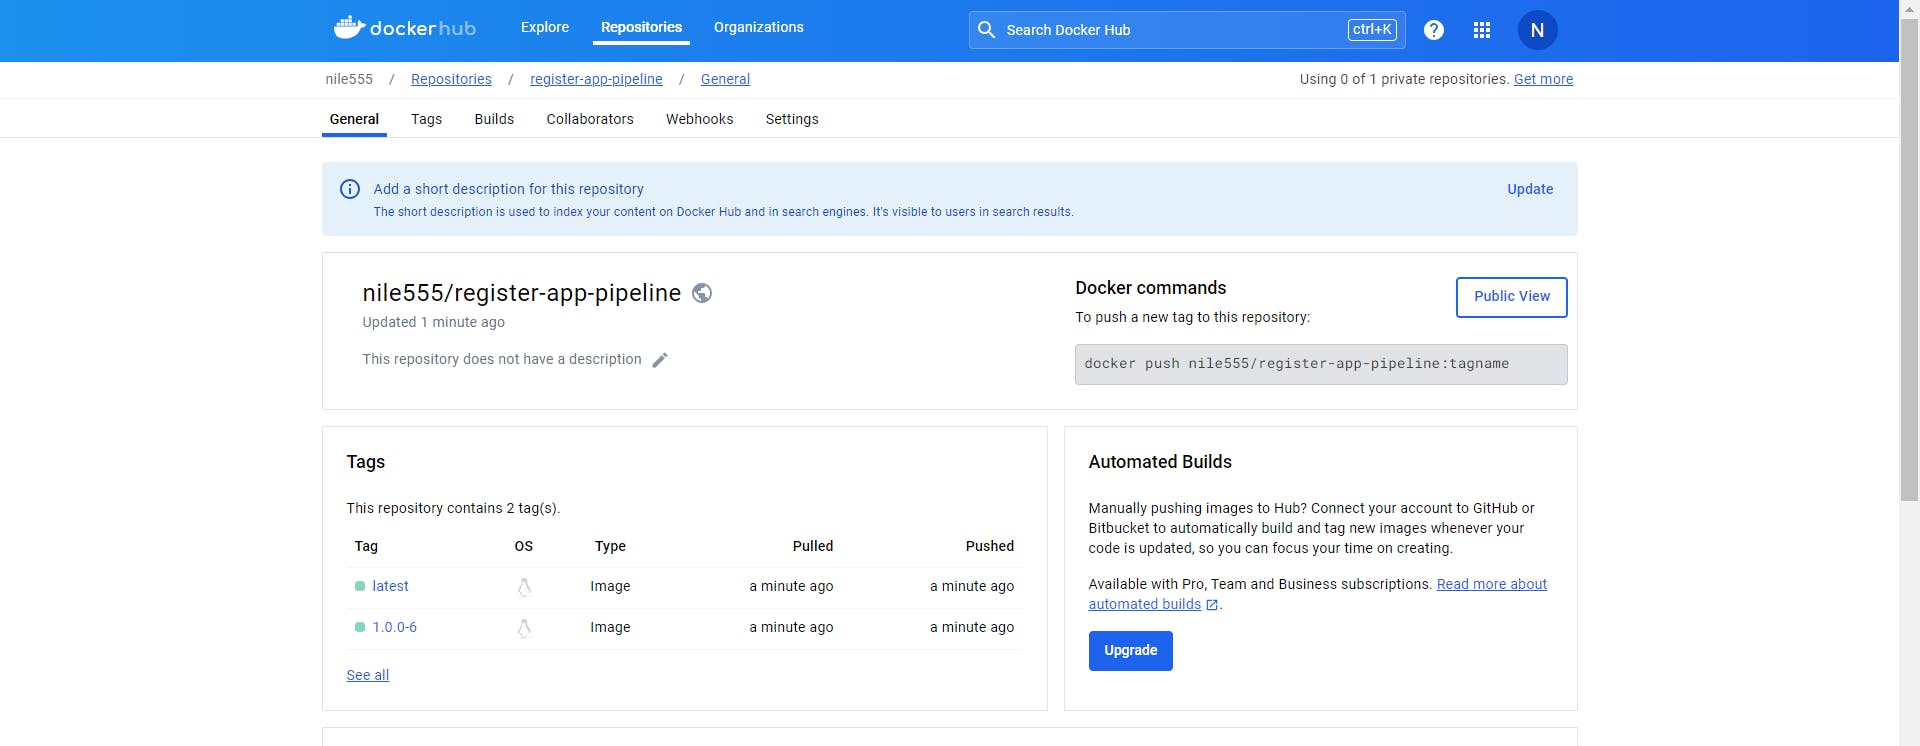
Now i am going to add one more stage for the build and push the docker images into the docker hub registry

Now build the Jenkins job

Now i will add 2 more stages in to my Jenkinsfile, The first stage would be Trivy scan which will scan our Docker Hub images.
Let's add the stages now in to the Jenkinsfile


Setup Bootstrap server for eksctl and Setup Kubernetes using eksctl
Create one EC2 instance with t2.micro and 8GB of storage.
Connect to the EC2 instance and run the below commands one by one
sudo apt update -y
sudo apt upgrade -y
Install AWS CLI on the above EC2
Refer--https://docs.aws.amazon.com/cli/latest/userguide/getting-started-install.html
$ sudo su
$ curl "https://awscli.amazonaws.com/awscli-exe-linux-x86_64.zip" -o "awscliv2.zip"
$ apt install unzip,
$ unzip awscliv2.zip $ sudo ./aws/install
OR
$ sudo yum remove -y aws-cli
$ pip3 install --user awscli
$ sudo ln -s
$HOME/.local/bin/aws /usr/bin/aws
$ aws --version
Installing kubectl
Refer--https://docs.aws.amazon.com/eks/latest/userguide/install-kubectl.html $ sudo su
$ curl -O https://s3.us-west-2.amazonaws.com/amazon-eks/1.27.1/2023-04-19/bin/linux/amd64/kubectl ,
$ chmod +x ./kubectl //Gave executable permisions
$ mv kubectl /bin //Because all our executable files are in /bin
$ kubectl version --output=yaml
Installing eksctl
Refer---https://github.com/eksctl-io/eksctl/blob/main/README.md#installation
$ curl --silent --location "[github.com/weaveworks/eksctl/releases/lates.. -s)_amd64.tar.gz" | tar xz -C /tmp
$ cd /tmp
$ sudo mv /tmp/eksctl /bin
$ eksctl version

Now we need to create the IAM role which we will assign to EKS Bootstrape server
So Just login to your AWS Console and create one IAM role
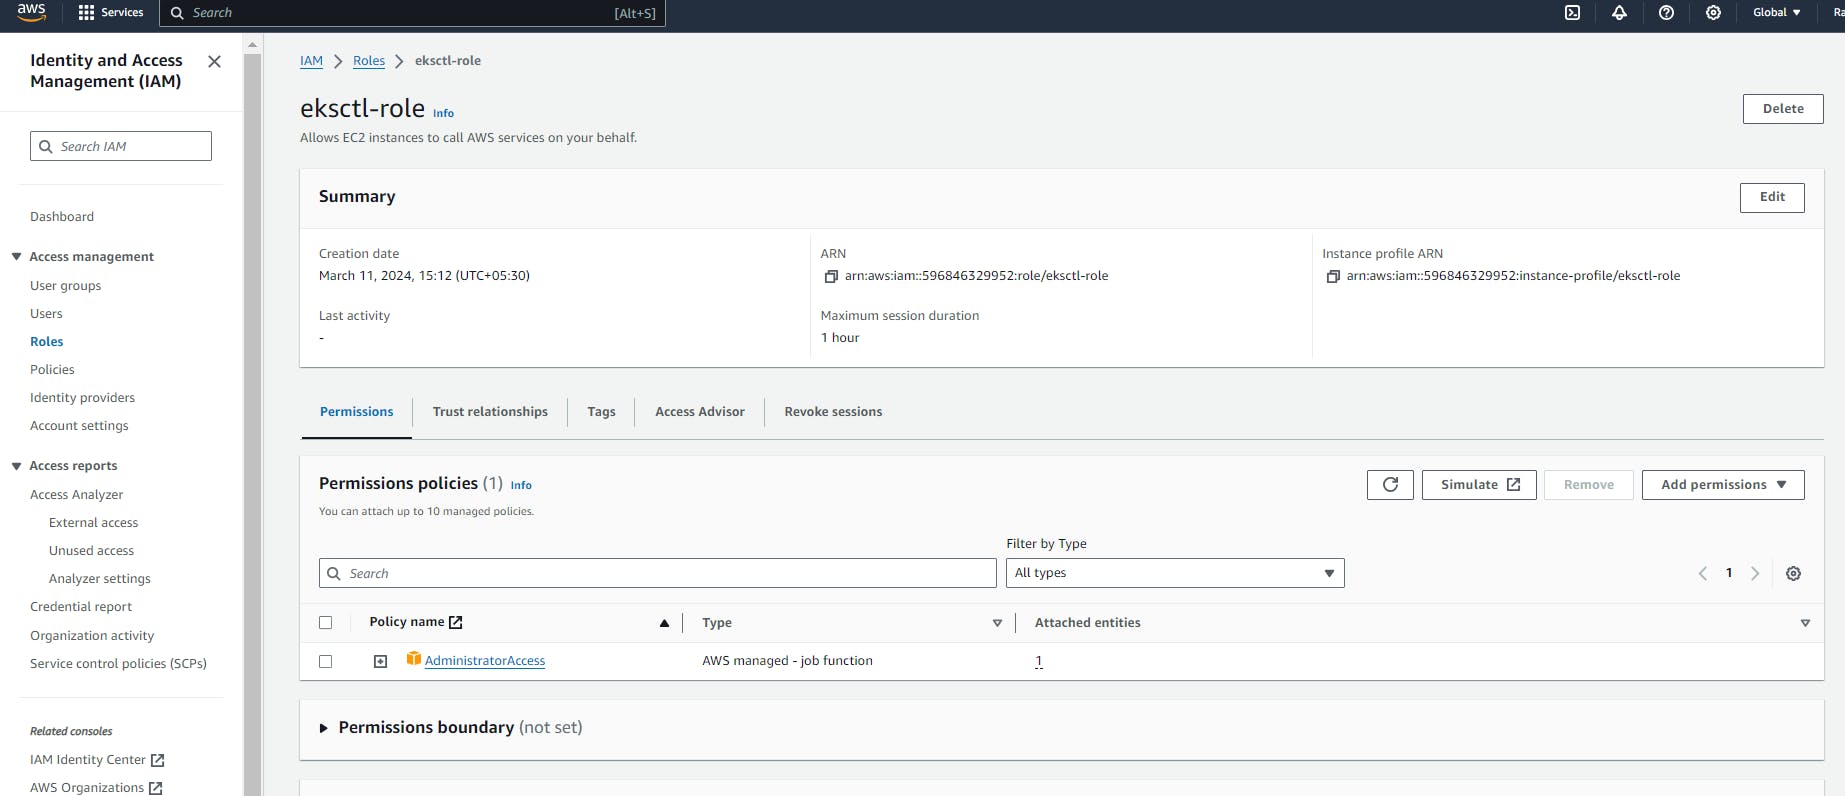
Now attached that role to your EKS bootstrape server
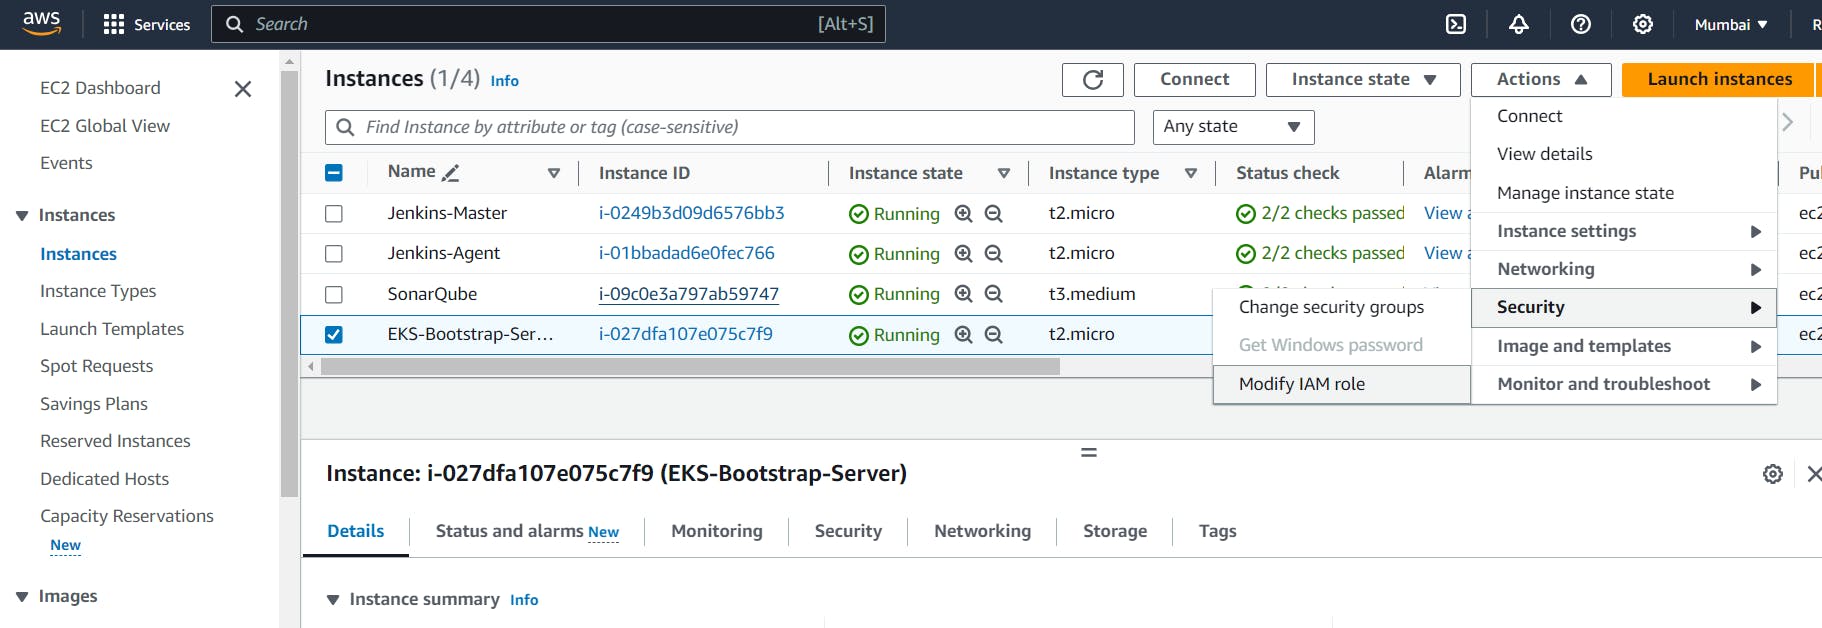

Now we are going to create kubernetes cluster using eksctl


ArgoCD Installation on EKS Cluster and Add EKS Cluster to ArgoCD
1 ) First, create a namespace $ kubectl create namespace argocd
2 ) Next, let's apply the yaml configuration files for ArgoCd
$ kubectl apply -n argocd -f raw.githubusercontent.com/argoproj/argo-cd/..
3 ) Now we can view the pods created in the ArgoCD namespace.
$ kubectl get pods -n argocd
4 ) To interact with the API Server we need to deploy the CLI:
$ curl --silent --location -o /usr/local/bin/argocd github.com/argoproj/argo-cd/releases/downlo..
$ chmod +x /usr/local/bin/argocd
5 ) Expose argocd-server
$ kubectl patch svc argocd-server -n argocd -p '{"spec": {"type": "LoadBalancer"}}'
6 ) Wait about 2 minutes for the LoadBalancer creation
$ kubectl get svc -n argocd
7 ) Get pasword and decode it.
$ kubectl get secret argocd-initial-admin-secret -n argocd -o yaml
$ echo WXVpLUg2LWxoWjRkSHFmSA== | base64 --decode
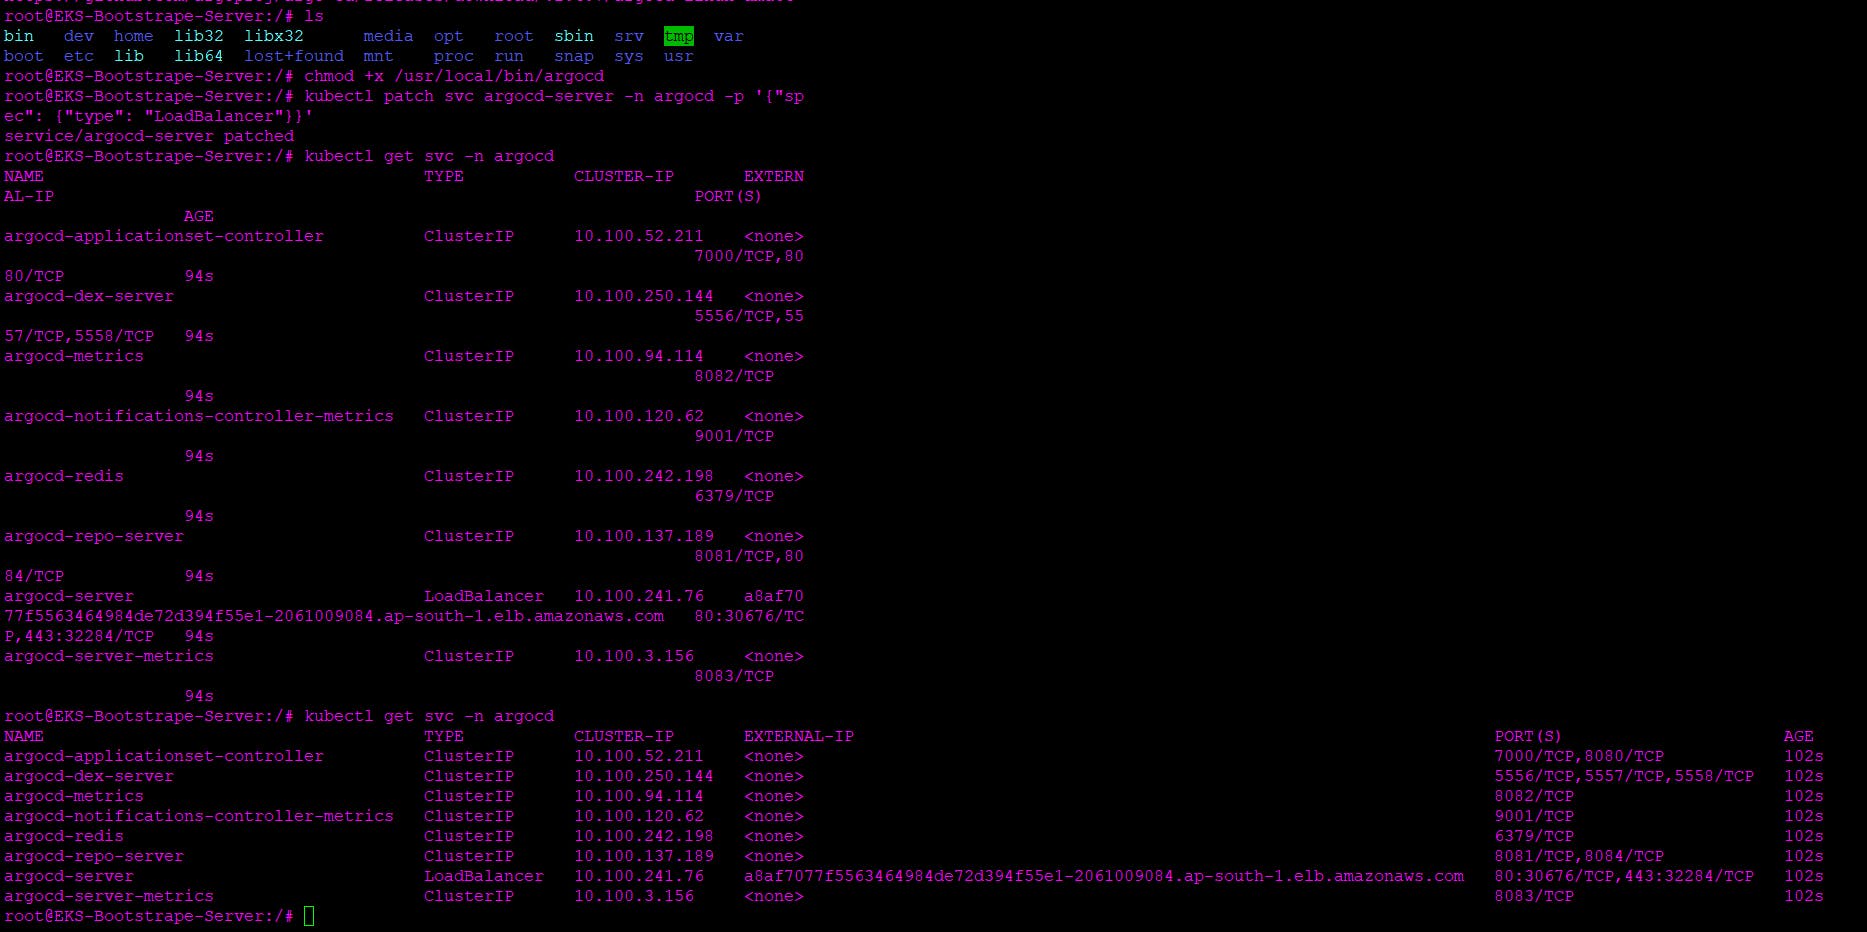
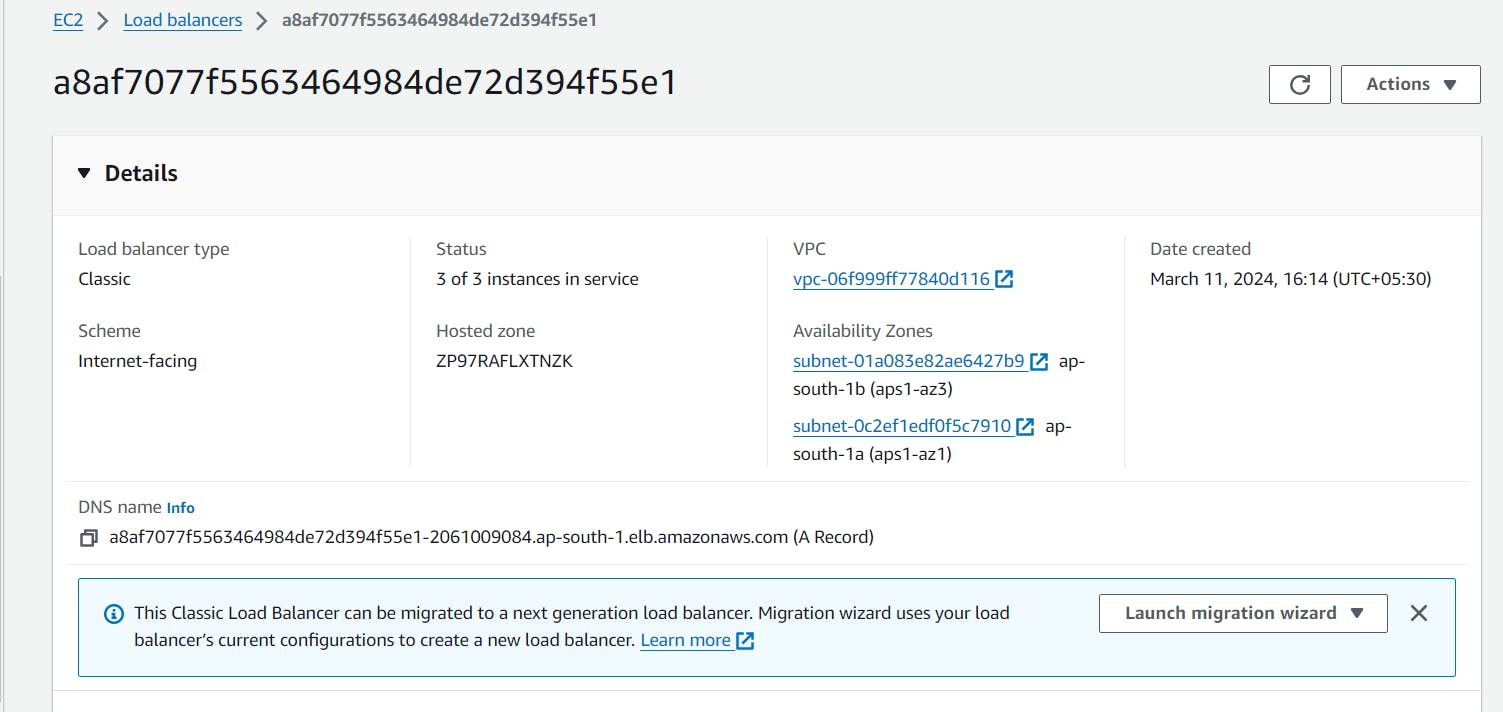

Now I will copy the DNS name for the load balancer created for ArgoCD cluster
"a8af7077f5563464984de72d394f55e1-2061009084.ap-south-1.elb.amazonaws.com"

You can update the password by going to user Info tab

Now we need to add EKS Cluster into the ArgoCD so for that we need to login to ArgoCD from the CLI
Add EKS Cluster to ArgoCD
1) login to ArgoCD from CLI
$ argocd login a8af7077f5563464984de72d394f55e1-2061009084.. --username admin
2) $ argocd cluster list
3) Below command will show the EKS cluster
$ kubectl config get-contexts
4) Add above EKS cluster to ArgoCD with below command
$ argocd cluster add nilesh@nilesh-cluster.ap-south-1.eksctl.io --name nilesh-eks-cluster
4) $ kubectl get svc


Configure ArgoCD to Deploy Pods on EKS and Automate ArgoCD Deployment Job Using GitOps GitHub Repository
We need to add our github repo where K8S manifest files are present into the ArgoCD


Now we have to deploy the resources and application on my EKS cluster through the ArgoCD
One thing should be noted that images name in the deployment manifest file should be match with DockerHub image name
Now create the ArgoCD app in the ArgoCD Dashboard

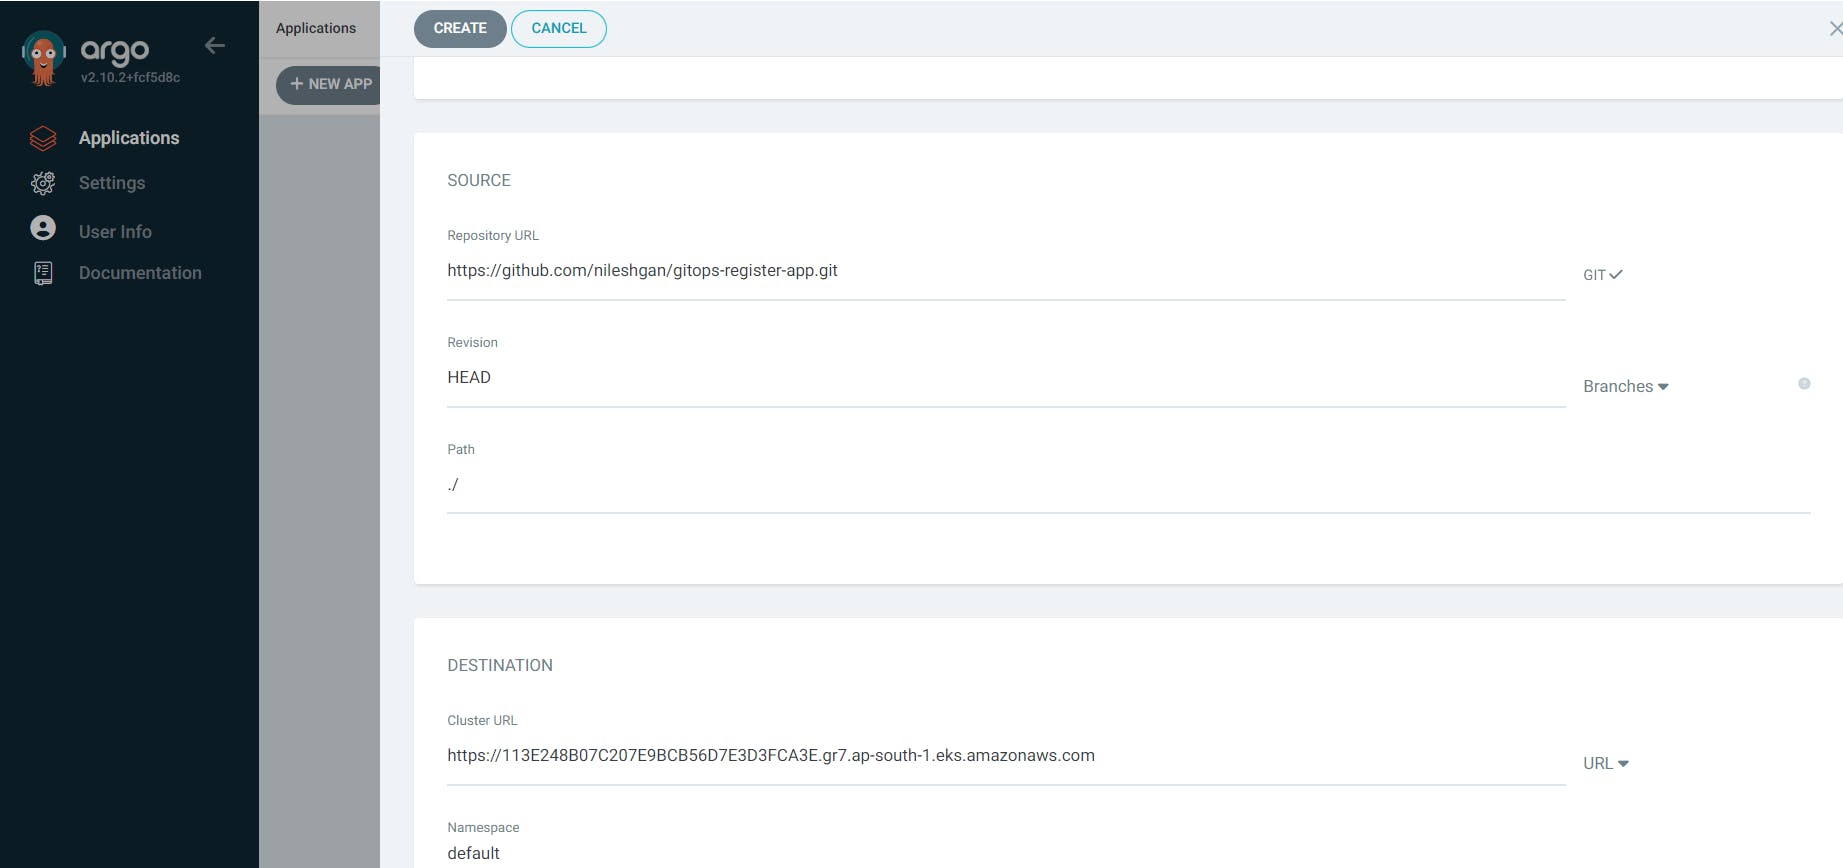

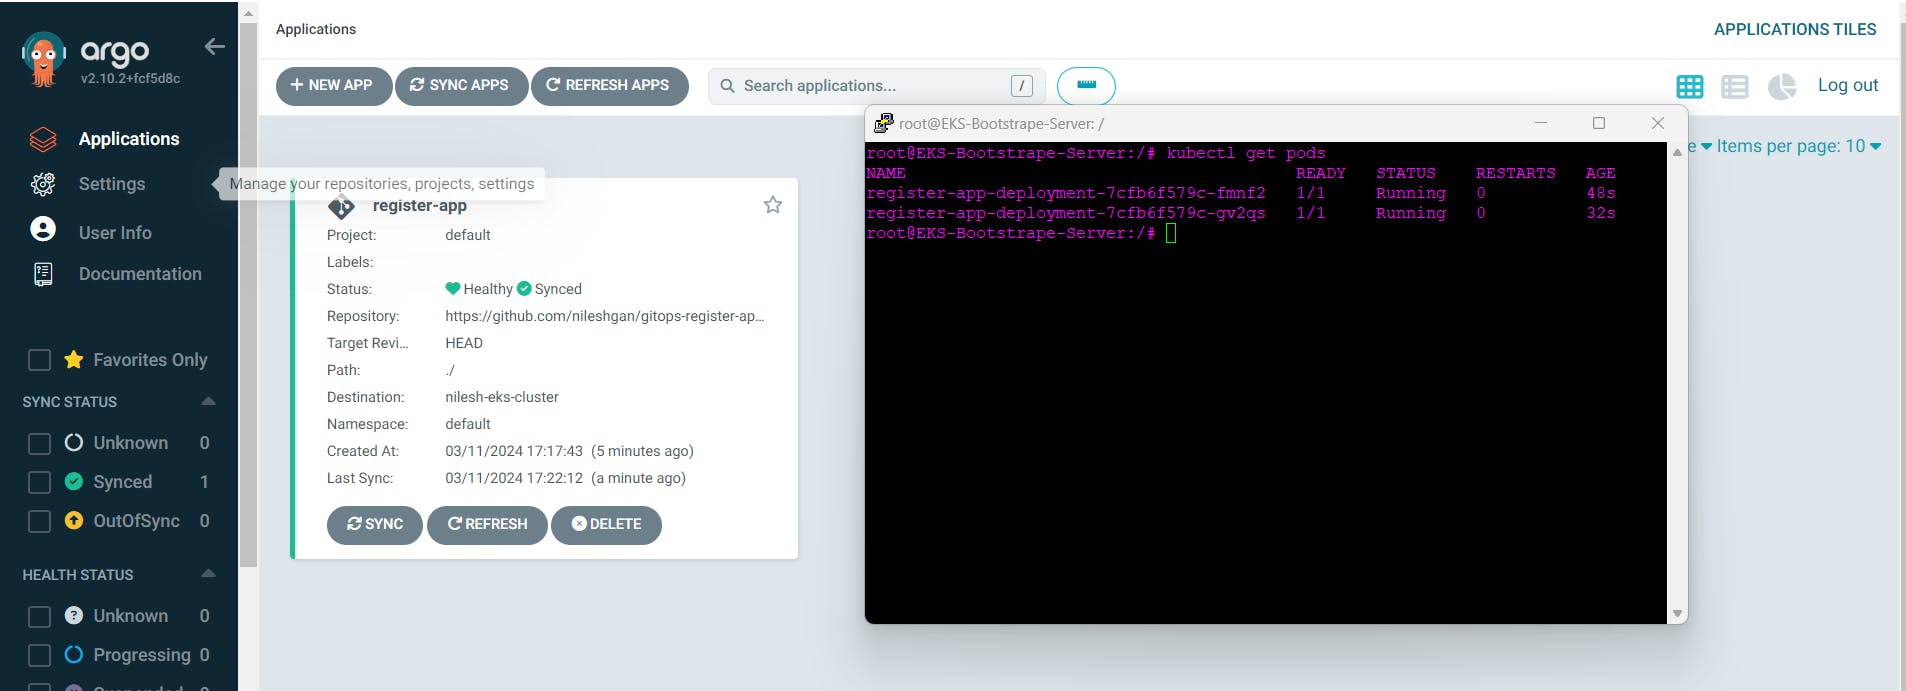
Now check for DNS name which is available in default namespace

http://a7638af9ff0824c4c92a84ccda1e04a7-1298511386.ap-south-1.elb.amazonaws.com:8080/

http://a7638af9ff0824c4c92a84ccda1e04a7-1298511386.ap-south-1.elb.amazonaws.com:8080/webapp/


We need to automate the deployment process, for this go to the Jenkins and create the CD job


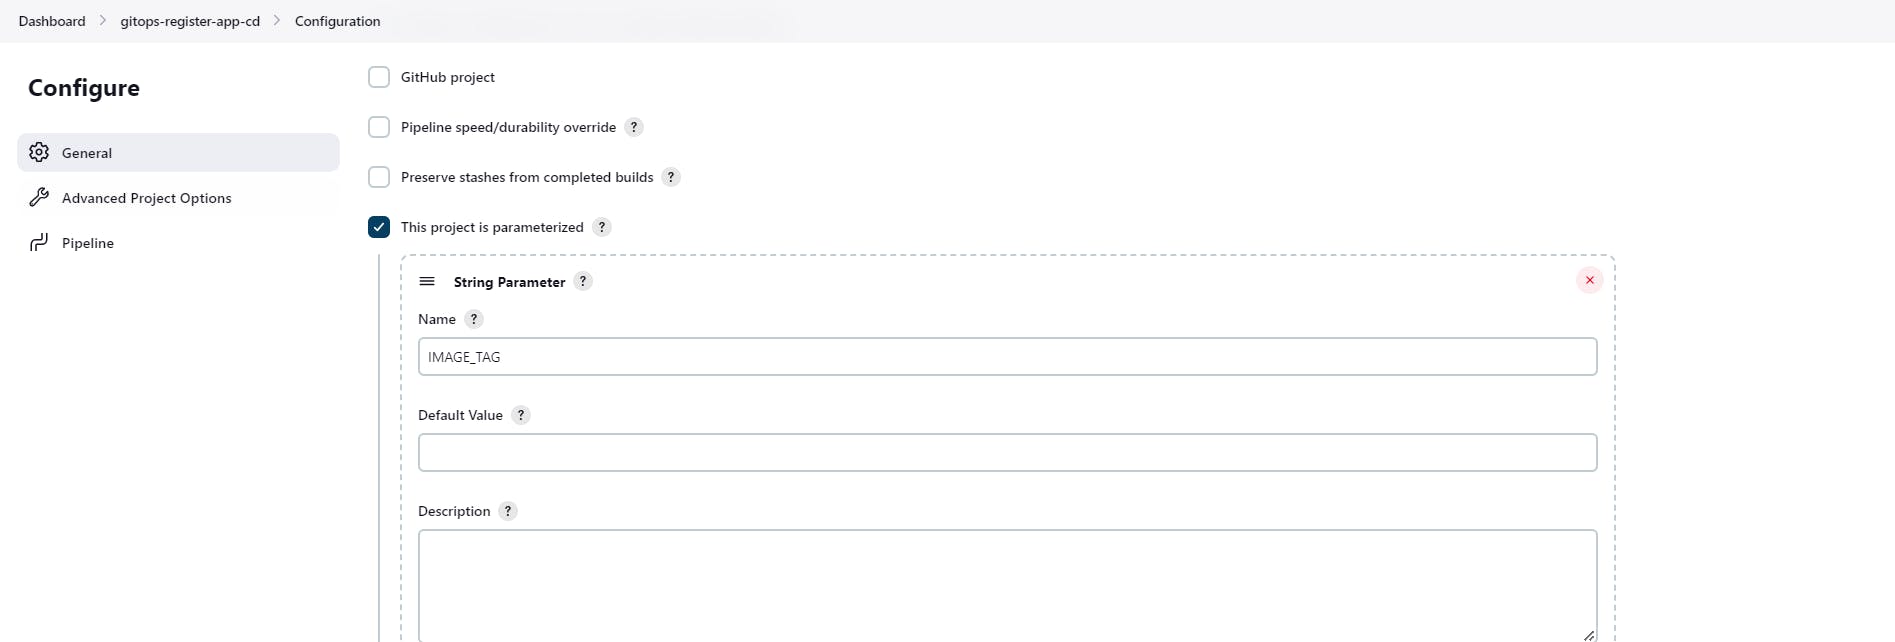


Now i am going to add one more stage in the Jenkinsfile

We need to add token which is JENKINS_API_TOKEN in the Jenkins user.
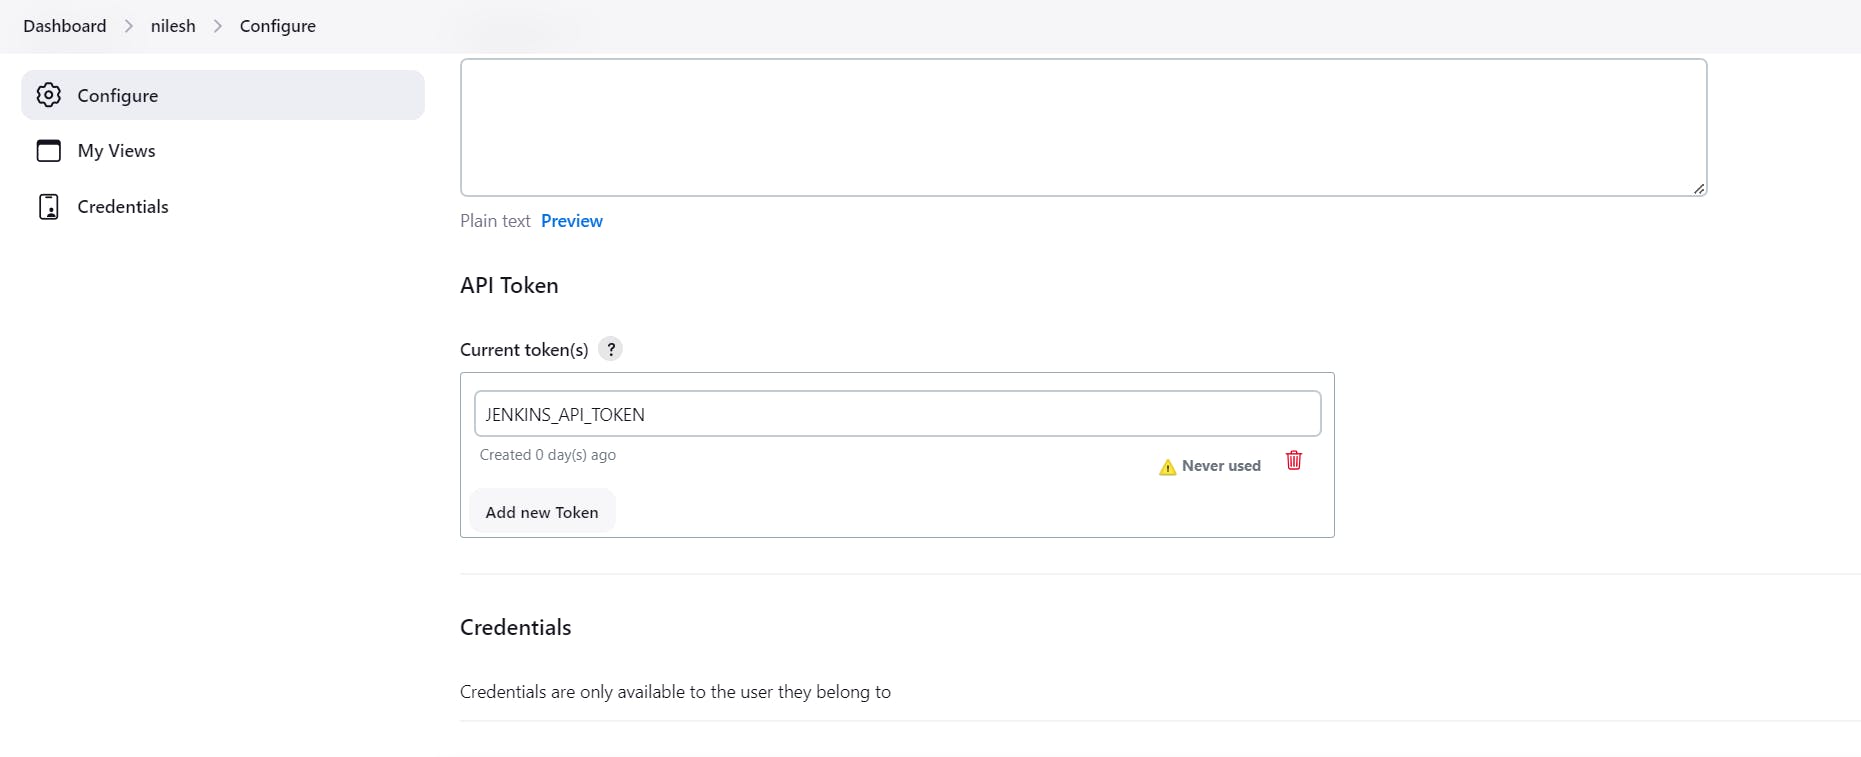
Now let's create credentials for the same

We need to define this in our Jenkinsfile, lets do it

Now lets create the Jenkinsfile for CD job
for this you can refer below repository
https://github.com/nileshgan/gitops-register-app.git
Once it is done Verify CI-CD pipeline y doing test commit on GitHub repo
Before this make sure that Poll SCM is configure. So whenever there is change in repository it will automatically build the job.
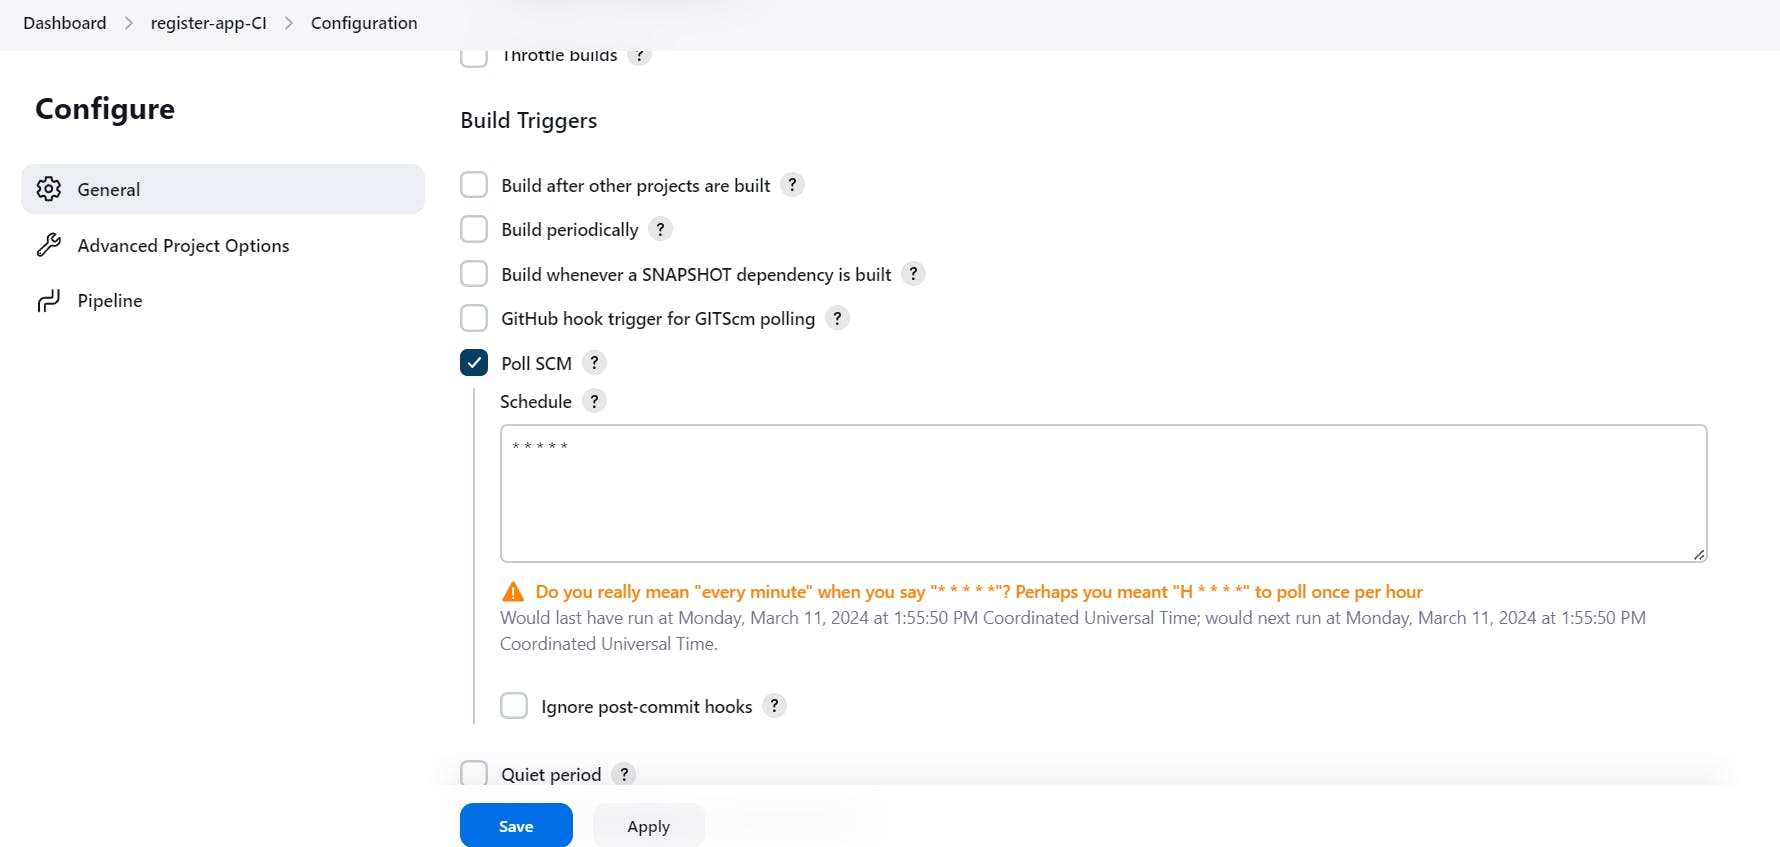
Now doo some changes in the repo and it will trigger it automatically.

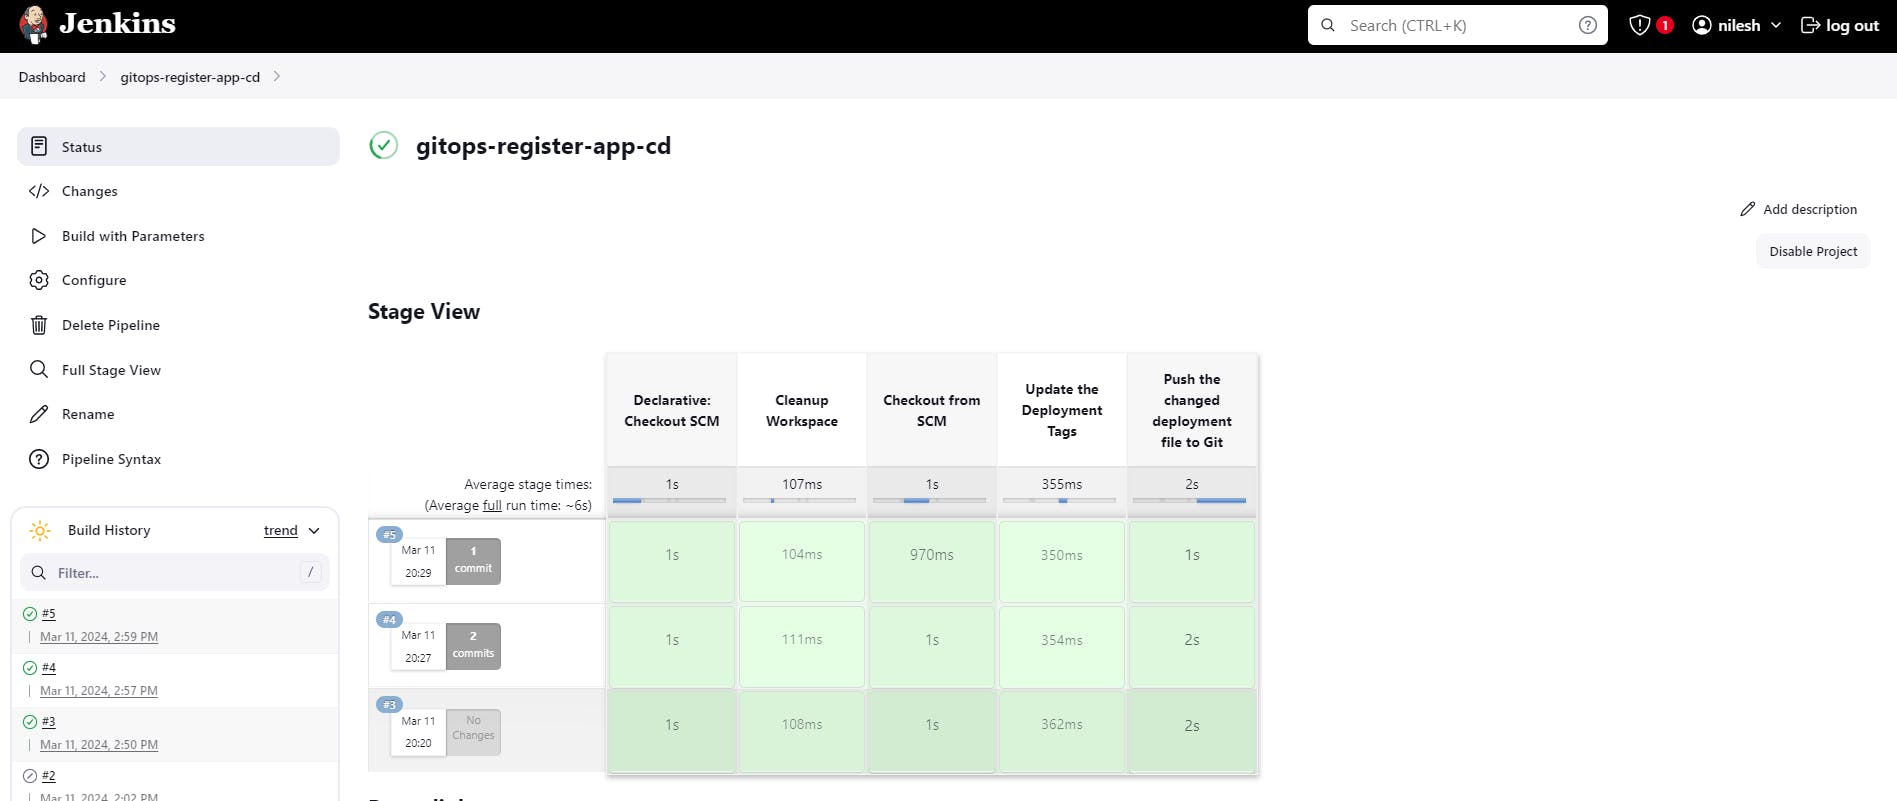
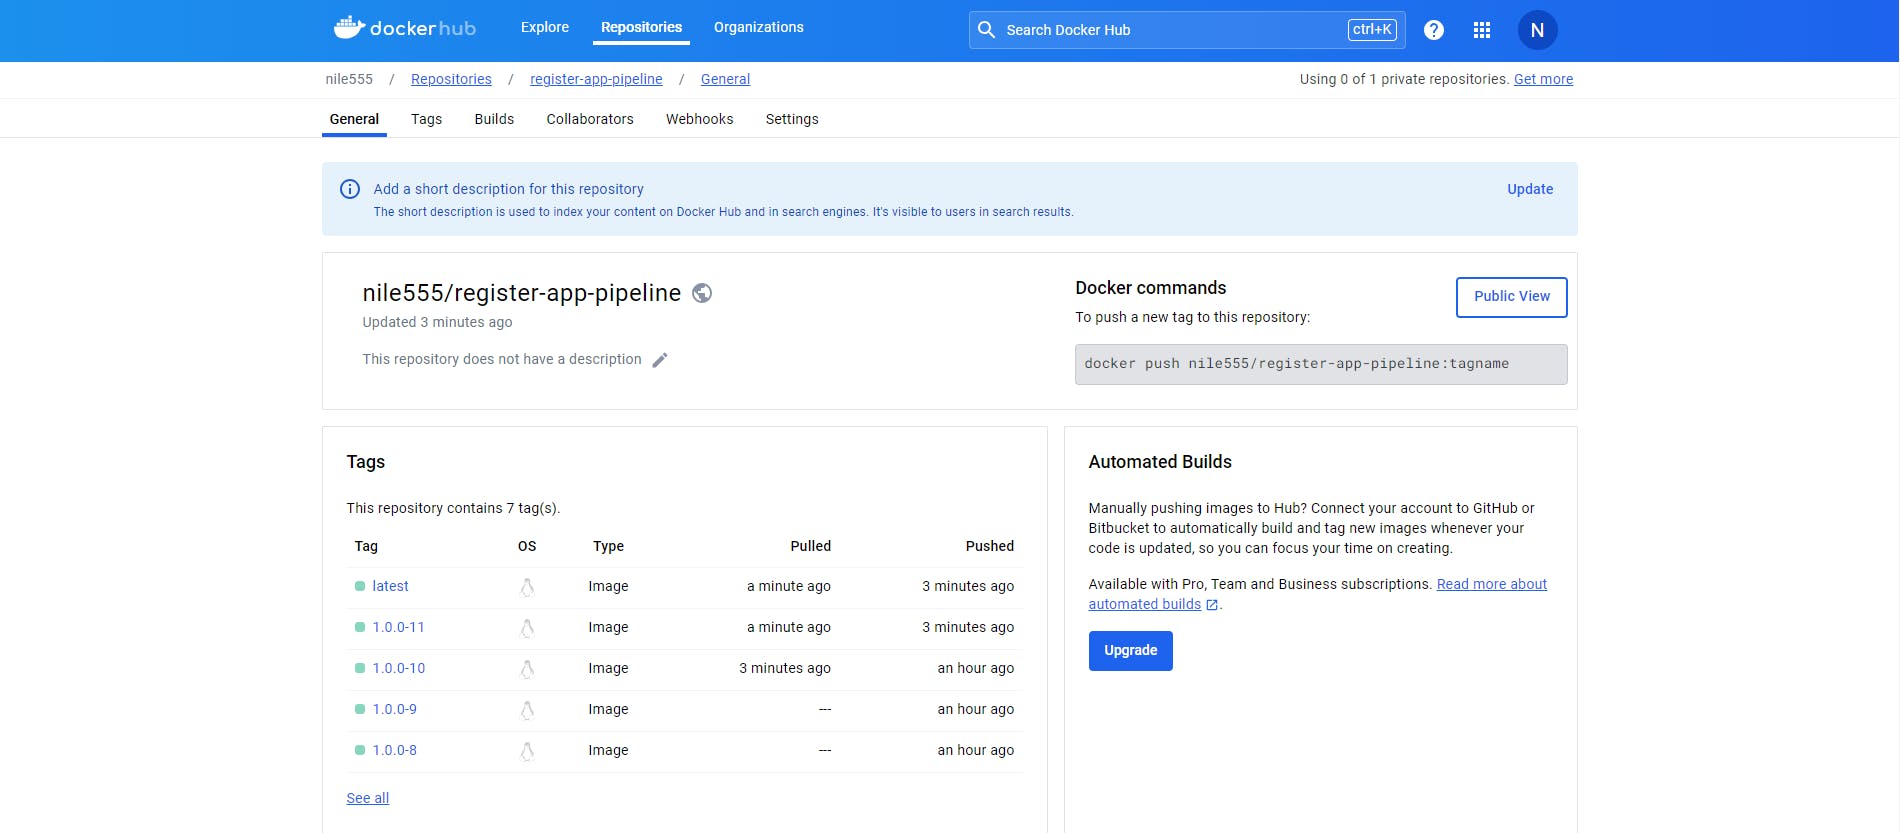


Our Project is Completed now.
Conclusion :-
DevOps project showcased the power of automation, collaboration, and continuous improvement in software development. By leveraging Git, Docker, Kubernetes, ArgoCD, SonarQube, Jenkins, and GitHub, we established a robust DevOps ecosystem that fostered agility, scalability, and innovation. Moving forward, we will continue to refine our processes, embrace new technologies, and strive for excellence in delivering high-quality software solutions.