Launching your First Kubernetes Cluster with Nginx running
In this tutorial, we will cover two tasks_
1. Installation of Minikube on Local Machine
2. Create our first pod on Kubernetes through Minikube.
What is Kubernetes?
Kubernetes is an orchestration tool from which we can manage our containers.
It is designed to automate the deployment, scaling, and management of containerized applications. Kubernetes can be used to manage and run applications in a variety of environments, including public, private, and hybrid clouds. Kubernetes provides a rich set of features that help manage the complexity of deploying and managing containerized applications at scale.
What is Minikube?
Minikube is a tool that sets up a Kubernetes environment on a local PC or laptop. Minikube supports all of the major operating systems – Windows, Linux, and macOS. It's designed for developers who want to experiment with Kubernetes without needing access to a full-scale production environment.
What is POD?
Pods are the smallest deployable units in the Kubernetes cluster. They contain one or more containers and are scheduled on nodes.
Consist of one or more tightly coupled containers.
Pod runs on node, which controlled by master.
Kubernetes only knows about pods (doesn't know about individual containers).
Can not start a container without pod.
One pod usually contains one container.
Task 1:- Installation of Minikube on Local Machine
Step 1:- Create one EC2 instance of Ubuntu OS.

Create your key pair here.

I am selecting the default VPC and security group here.

Selecting the default volume here. If you add a new volume you will get a bill from AWS.

Now just click on Launch Instance and your instance is getting ready.
Just wait for a few minutes to initialize it and once your instance status is 2/2 you will able to use it.


Now connect your EC2 instance through Putty.
Before installing Minikube, you need to install Docker on your Ubuntu instance.
Run the following commands to update your Ubuntu instance and install Docker.

Using the above command your system will be updated and docker will be installed in your system.
--> to check if docker is installed or not use the below command "which docker"
--> to check if the docker service is running or not use the command
"service docker status"

Install Minikube in your system.
To start Minikube, use the following command:
"sudo apt-get update -y"
sudo apt-get install curl
sudo apt-get install apt-transport-https
sudo apt install virtualbox virtualbox-ext-pack
Once you use this command you will get a prompt message like below

Next, the license agreement appears on the screen. Press Tab and then Enter to continue.
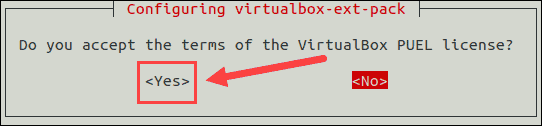
The installer asks you to agree with the terms of the VirtualBox PUEL license by selecting Yes.
First, download the latest Minikube binary using the wget command:
wget https://storage.googleapis.com/minikube/releases/latest/minikube-linux-amd64
Copy the downloaded file and store it into the /usr/local/bin/minikube directory with:
sudo cp minikube-linux-amd64 /usr/local/bin/minikube
Next, give the file executive permission using the chmod command:
sudo chmod 755 /usr/local/bin/minikube
Finally, verify you have successfully installed Minikube by checking the version of the software:
minikube version
Download kubectl with the following command:
curl -LO https://storage.googleapis.com/kubernetes-release/release/`curl -s https://storage.googleapis.com/kubernetes-release/release/stable.txt`/bin/linux/amd64/kubectl
Make the binary executable by typing:
chmod +x ./kubectl
Then, move the binary into your path with the command:
sudo mv ./kubectl /usr/local/bin/kubectl
Verify the installation by checking the version of your kubectl instance:
kubectl version -o json
Run the following command:
minikube start
To see the kubectl configuration use the command:
kubectl config view
To show the cluster information:
kubectl cluster-info
To check running nodes use the following command:
kubectl get nodes
To see a list of all the Minikube pods run:
kubectl get pod
We have successfully installed Minikube on your Ubuntu instance running on AWS EC2 and started a Kubernetes cluster using Docker as the driver. You can now start deploying your pods and services on the Kubernetes cluster.
Task 2:- Create our first pod on Kubernetes through Minikube.
Create a deployment YAML file for Nginx using your preferred text editor. For example, create a file called nginx-deployment.yaml and paste the following content:
 apiVersion: apps/v1
 kind: Deployment
 metadata:
   name: nginx-deployment
   labels:
     app: nginx-app
 spec:
   replicas: 2
   selector:
     matchLabels:
       app: nginx-app
   template:
     metadata:
       labels:
         app: nginx-app
     spec:
       containers:
       - name: nginx
         image: nginx
         ports:
         - containerPort: 80
Apply the deployment YAML file to the Kubernetes cluster using the following command:
kubectl apply -f nginx-deployment.yamlThis command creates a deployment object in the Kubernetes cluster that manages the creation and scaling of the Nginx pods.
Verify that the deployment is running using the following command:
kubectl get deploymentThis command shows the status of all the deployments running in the Kubernetes cluster, including the
nginx-deployment.Verify that the pods are running using the following command:
kubectl get podsThis command shows the status of all the pods running in the Kubernetes cluster, including the Nginx pods created by the
nginx-deployment.Verify that the Nginx service is running using the following command:
kubectl get svcThis command shows the status of all the services running in the Kubernetes cluster, including the Nginx service created by the
nginx-deployment.
Successfully we have created Nginx pod on kubernetes using Minikube.
